
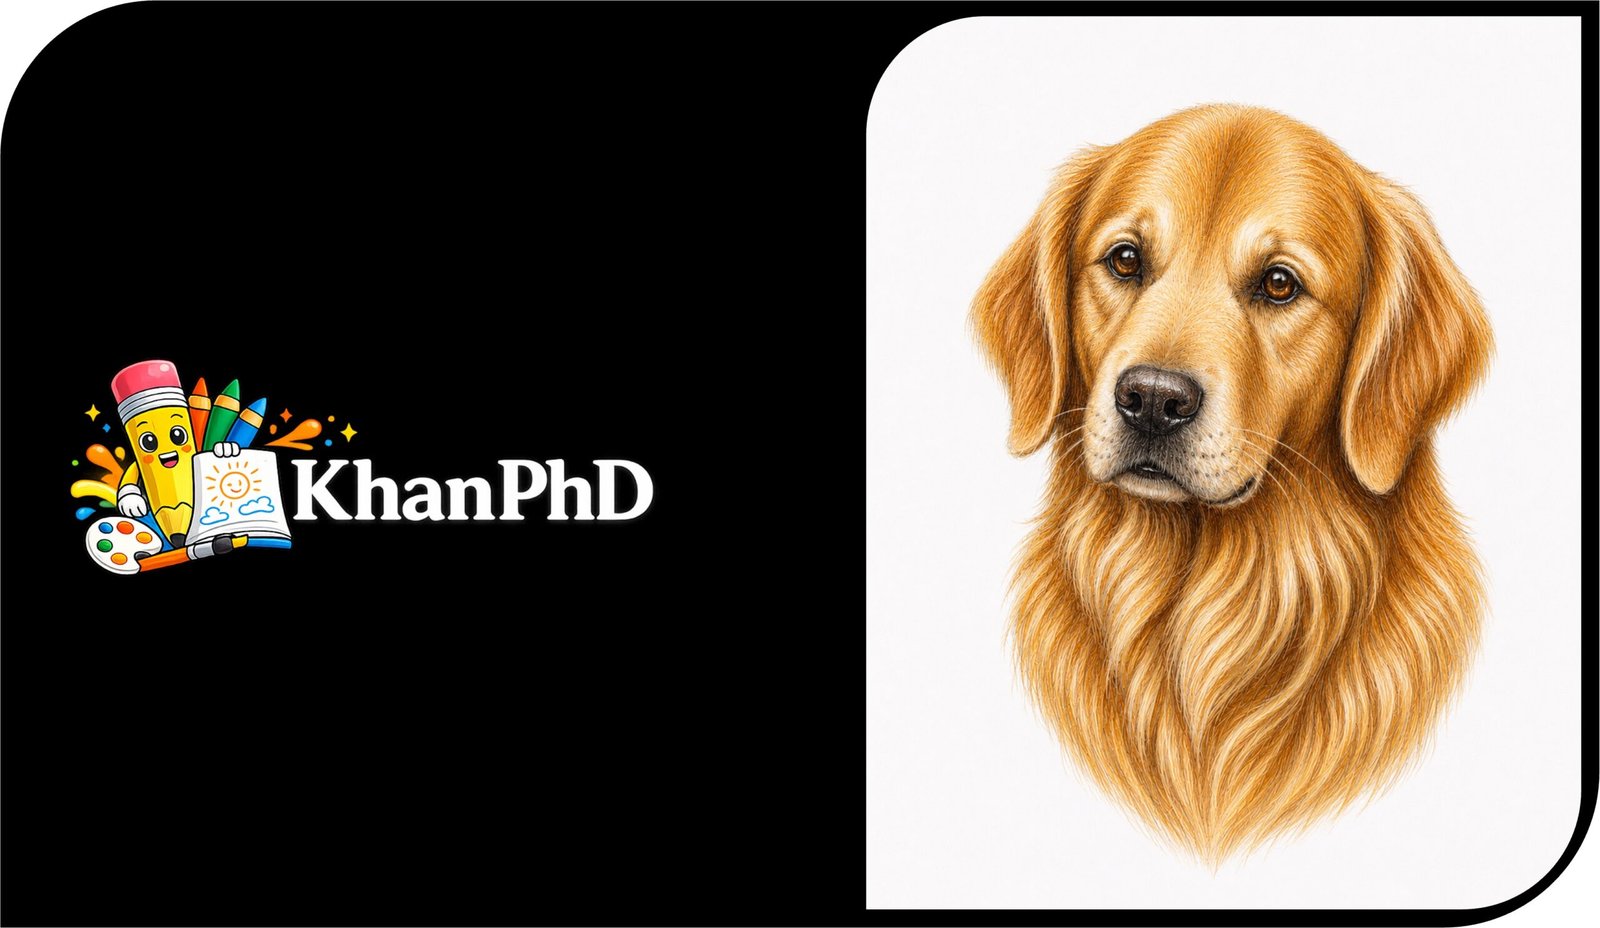
Easy Realistic Colourful Dog Drawing
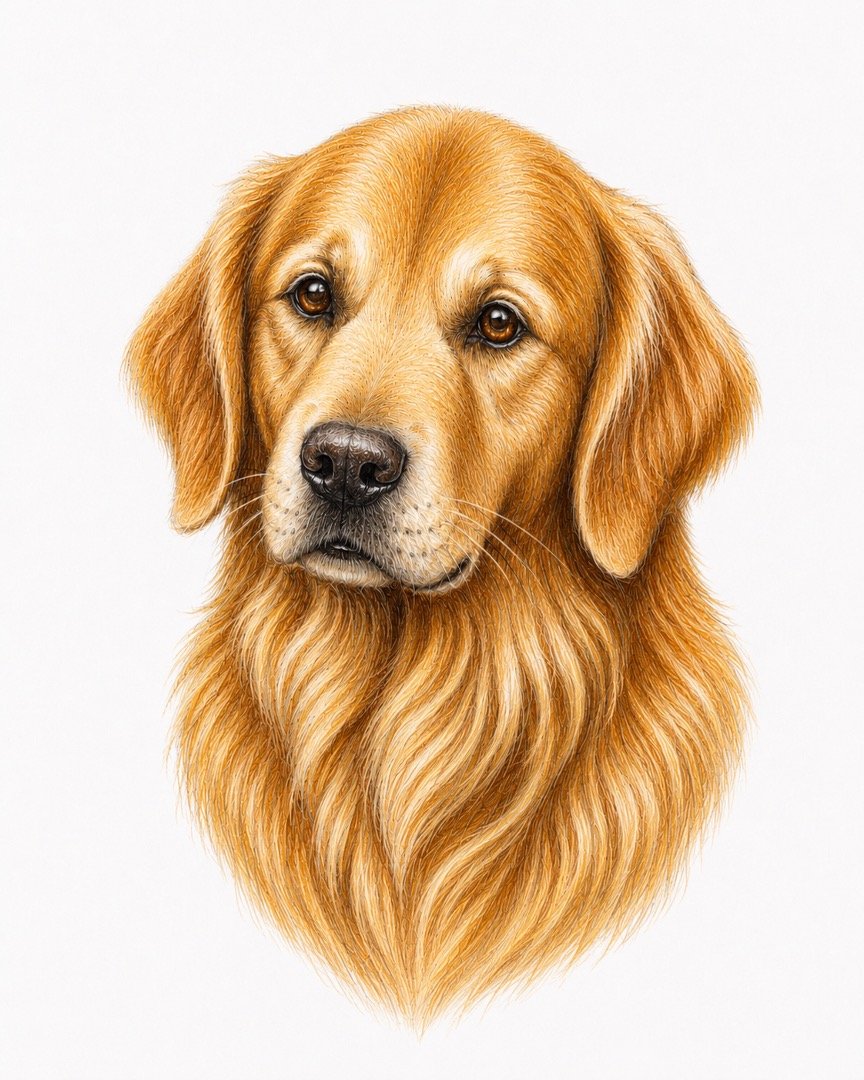
Drawing a realistic dog may look difficult at first, especially when you are working with soft fur, gentle eyes, and many shades of gold. The good news is that you do not need any previous drawing experience for this tutorial. We will build the Golden Retriever slowly from simple circles and curved lines, then add colour in light, manageable layers. By the end, you will have a warm, colourful portrait with expressive eyes, a shiny nose, floppy ears, and soft golden fur.
You will need a regular HB pencil for the first sketch, a soft eraser, smooth white drawing paper, and coloured pencils in cream, yellow ochre, golden brown, reddish brown, dark brown, black, pink, and white. A colourless blending pencil or blending stump is helpful, but a clean cotton swab can also soften some areas. Keep a scrap sheet nearby for testing colours and protecting the drawing from smudges.
Set aside about 60 to 90 minutes, although it is perfectly fine to spread the project over several short sessions. There is no need to rush; realistic colour develops through patient layering rather than heavy pressure.
The tutorial is divided into eight clear steps, beginning with basic shapes and ending with highlights, fur texture, colour blending, and final polish. Pause whenever you need to, compare the two sides of the face often, and remember that small differences can give your Golden Retriever extra personality.
EASY REALISTIC COLOURFUL DOG DRAWING
Step 1: Sketch the Basic Shapes
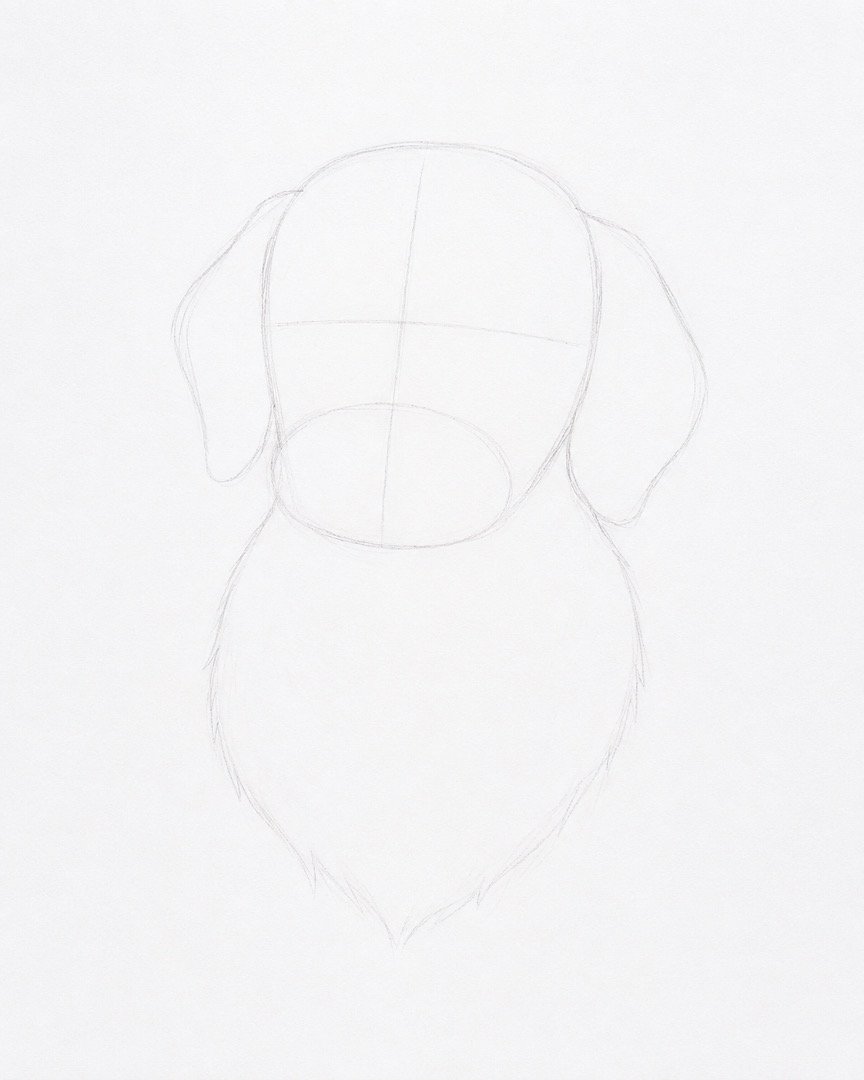
Use very light pencil pressure so your first lines are easy to erase. Draw a large, softly rounded oval for the head, then add a smaller horizontal oval near the bottom for the muzzle. Sketch two loose shapes hanging from the sides for the floppy ears and a wider curved shape underneath for the upper chest. Add one vertical guideline and one horizontal guideline across the face to help place the features evenly.
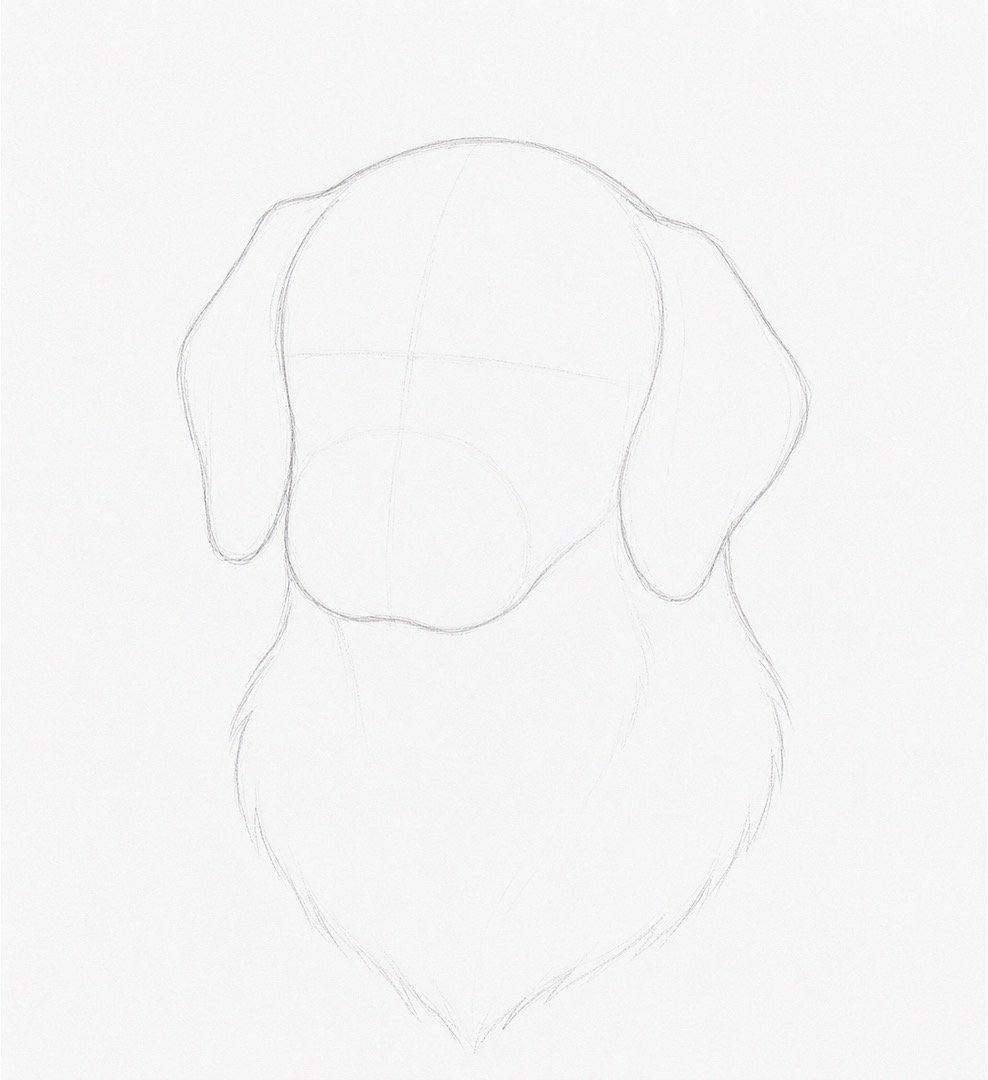
Step 2: Refine the Outline and Proportions
Using the basic shapes as a guide, draw a smoother outer edge around the head, cheeks, ears, and chest. Golden Retrievers have broad heads, gentle cheek curves, and ears that begin near eye level, so check that the ears are not placed too high. Narrow the muzzle slightly as it approaches the nose and give the chest an uneven, softly pointed edge to suggest long fur. Keep your lines light and erase only the construction marks you no longer need.
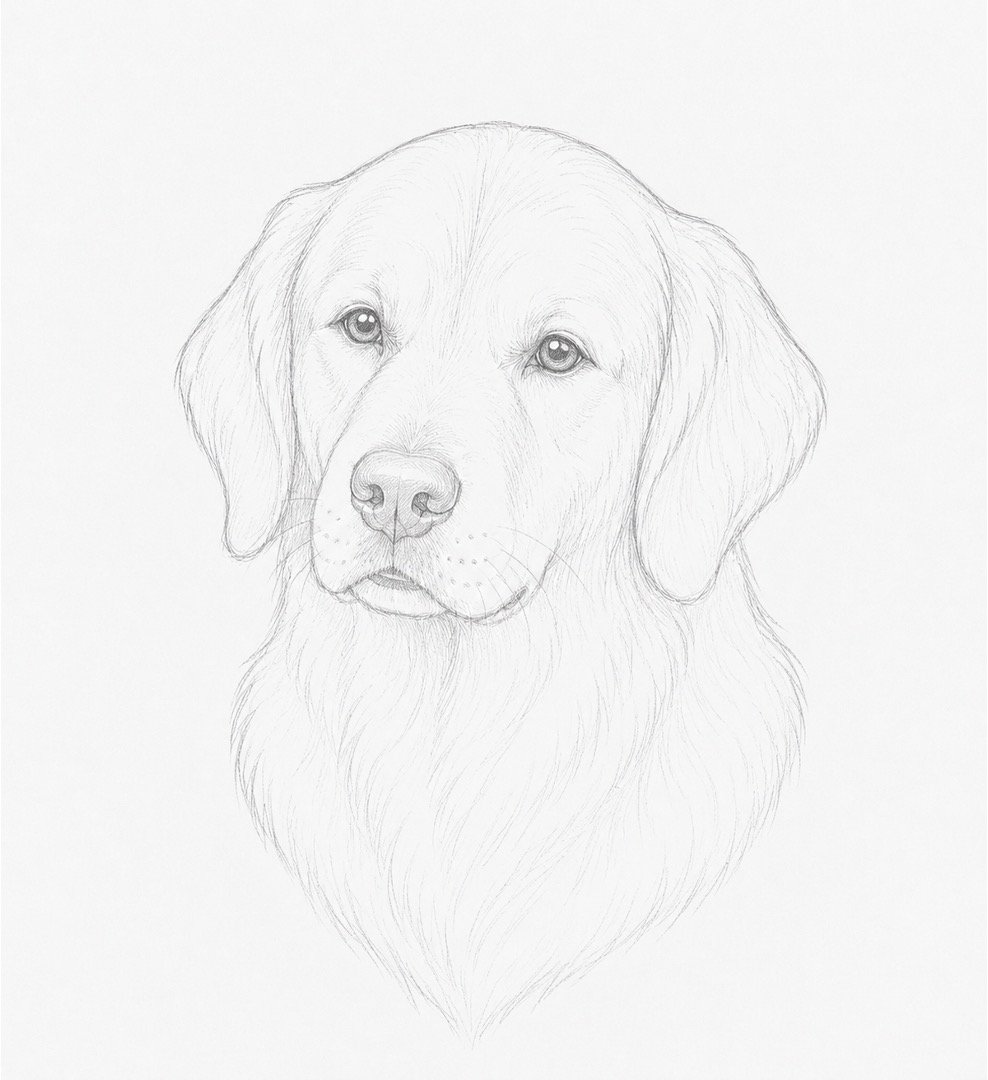
Step 3: Add the Main Features
Place the almond-shaped eyes along the horizontal guideline, leaving about one eye-width between them. Draw the nose as a rounded triangle at the front of the muzzle, then add a short centre line leading down to the gently curved mouth. Sketch the inner edges of the ears and mark a few important fur directions around the cheeks, forehead, muzzle, and chest. Use slightly firmer pressure for the eyes and nose, but keep the fur guides soft and broken rather than drawing one heavy outline.
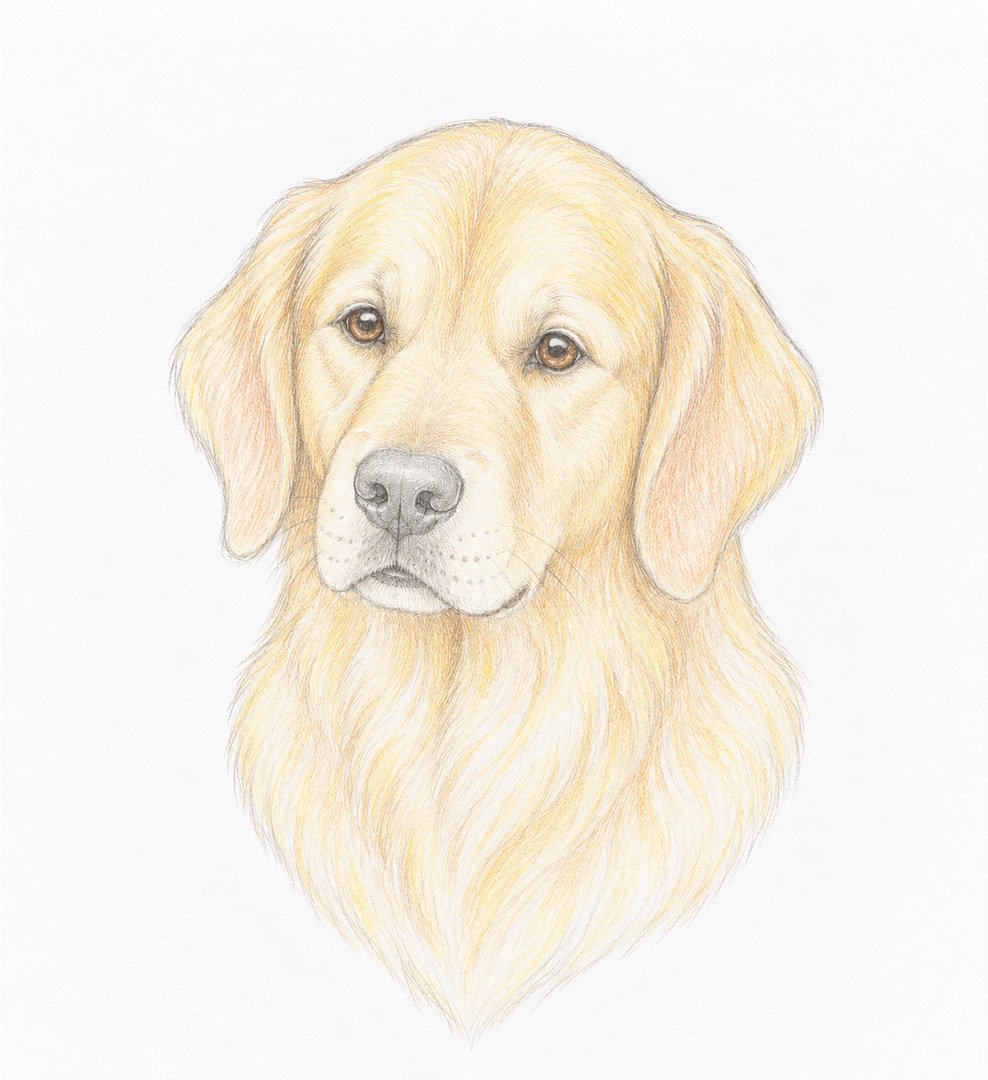
Step 4: Lay Down the Light Colours
Begin colouring with very gentle pressure, allowing plenty of white paper to remain visible. Cover most of the fur with a pale cream or light golden-yellow layer, following the direction in which the fur grows. Add soft peach or pale pink inside the ears and a light warm beige across the muzzle. Colour the eyes with light brown and place a pale grey layer on the nose, saving the darkest colours for later.
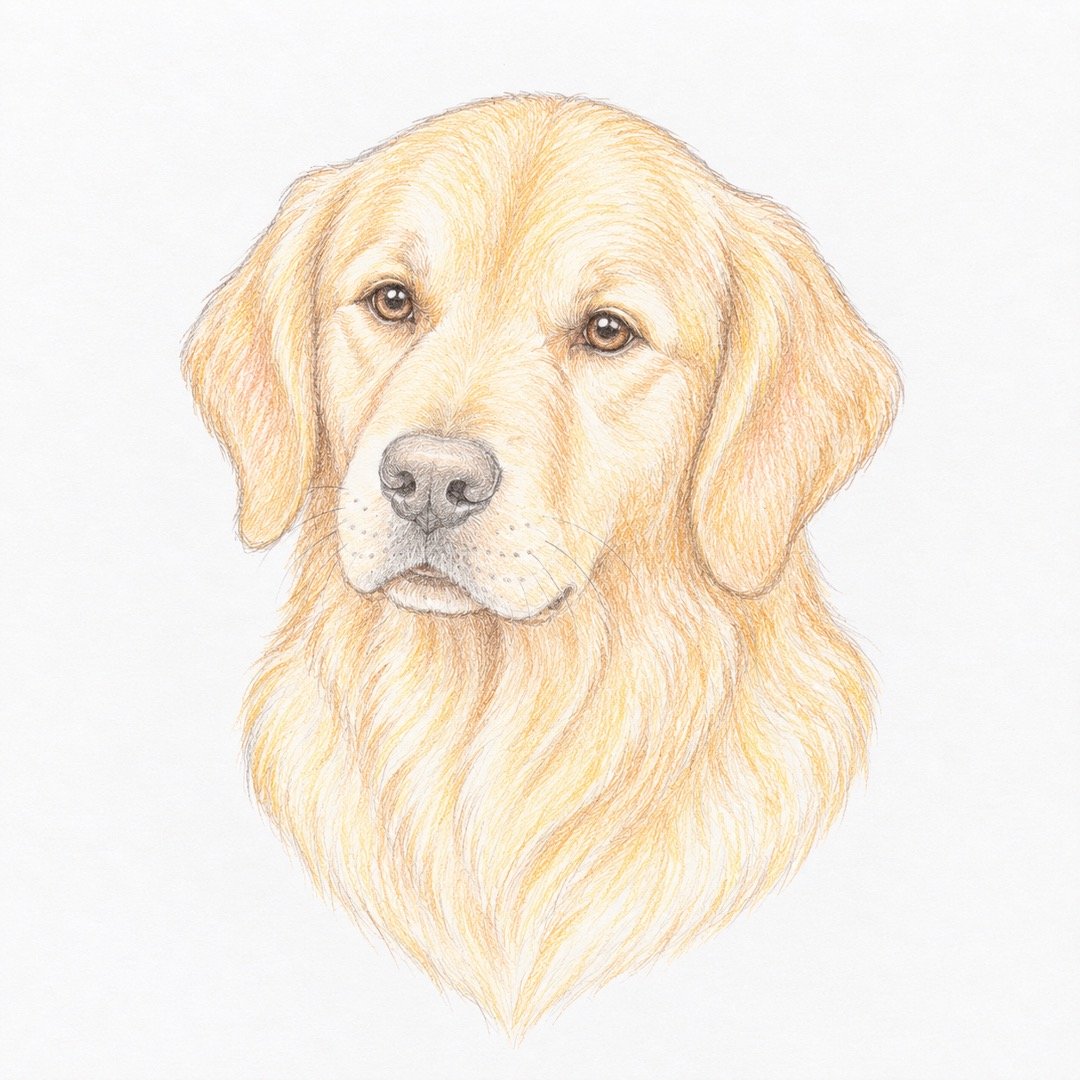
Step 5: Build the Mid-Tones
Add a second layer using yellow ochre, warm gold, and light brown. Place more colour around the sides of the forehead, beneath the ears, along the cheeks, and between the sections of chest fur, while leaving the centre of the face lighter. Use short strokes on the face and longer strokes on the ears and chest to match the different fur lengths. Deepen the eyes with medium brown, keeping the small highlight shapes untouched.
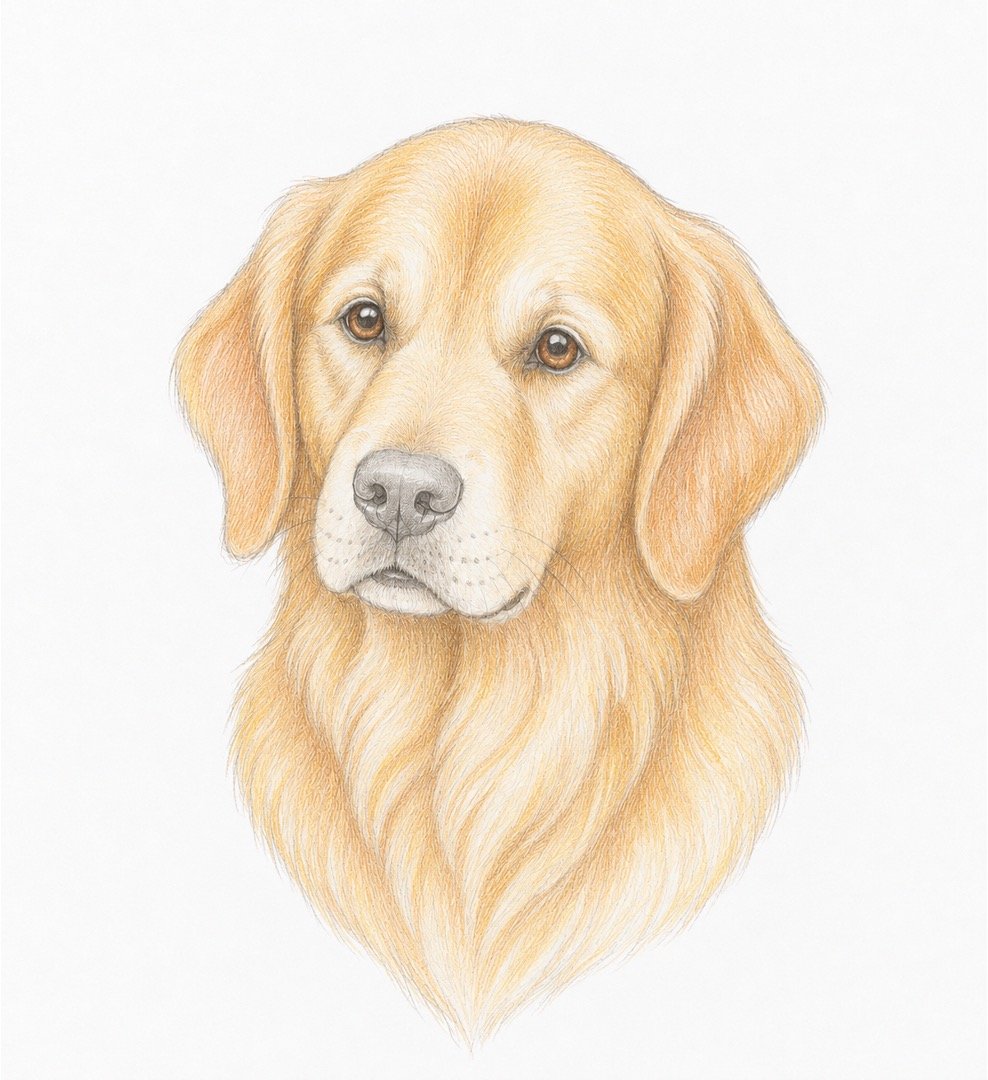
Step 6: Deepen the Shadows
Use dark brown rather than pure black for most of the deepest fur shadows, as this keeps the coat warm and natural. Darken the fur beneath the ears, around the outer cheeks, under the muzzle, and in the spaces where chest tufts overlap. Add dark brown and a small amount of black to the pupils, nostrils, mouth line, and lower edge of the nose. Build these shadows gradually with several light layers instead of pressing hard all at once.
Step 7: Add Fur Texture and Highlights
Sharpen a cream or white pencil and add fine strokes over the coloured layers to suggest individual hairs. Concentrate the clearest strands around the ears, cheeks, chest, eyebrows, and edges of the muzzle rather than covering every area equally. Add tiny white highlights to the eyes and a soft shine across the upper part of the nose. You can also place a few dark whisker dots and thin whiskers, using a light touch so they remain delicate.
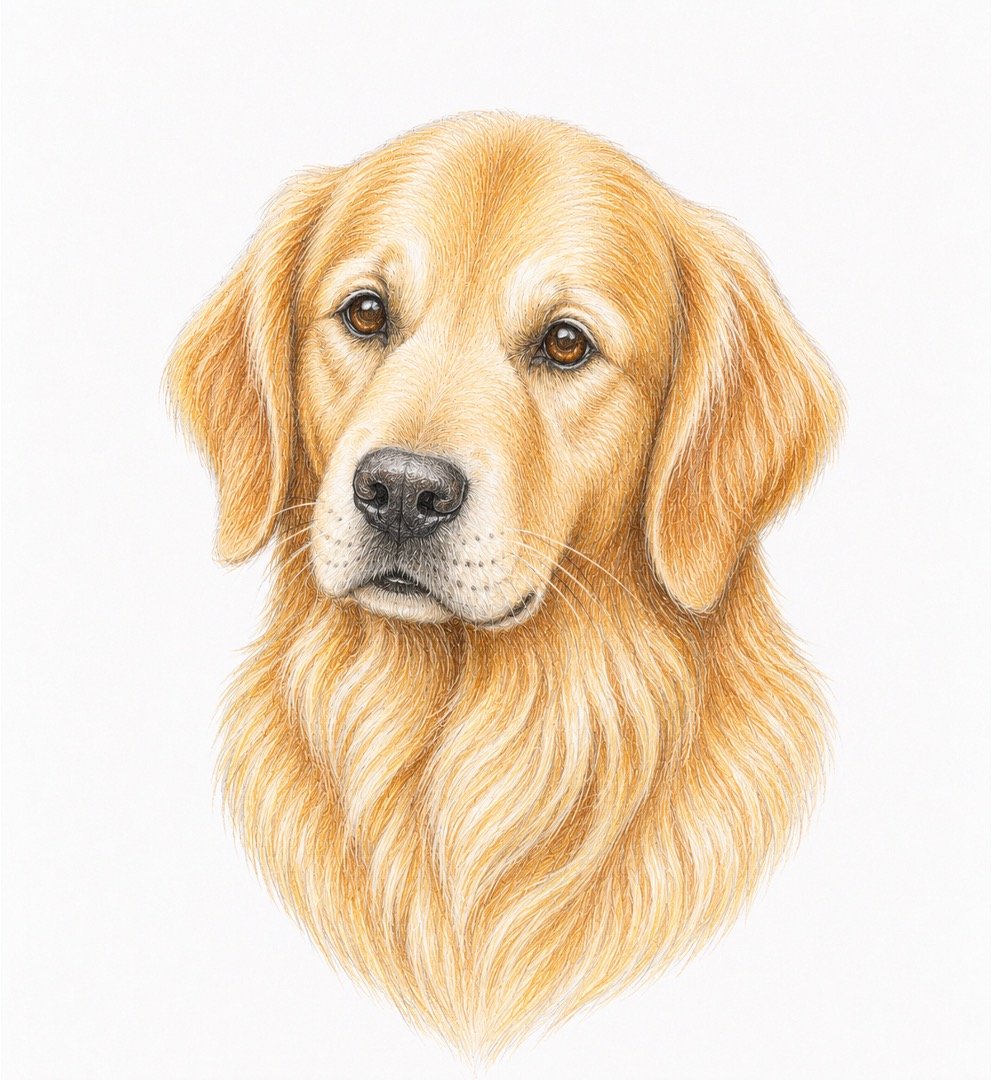
Step 8: Blend and Polish the Drawing
Step back and check whether the eyes, nose, and mouth feel balanced before making your final changes. Gently blend uneven colour transitions with a colourless blending pencil, a light cream pencil, or small circular strokes, but do not remove all visible fur texture. Strengthen a few of the darkest shadows and restore any highlights that became dull during blending. Erase stray marks around the portrait, soften any harsh outer lines, and finish with a few carefully placed golden and white hairs.
TIPS
- Keep your first sketch light. Dark construction lines can be difficult to cover once you begin adding pale golden colours.
- Build colour through several gentle layers instead of pressing hard. Slow layering creates smoother, richer, and more realistic fur.
- Follow the direction of the fur with every pencil stroke. Short strokes suit the face, while longer strokes work well on the ears and chest.
- Do not worry about making both sides perfectly identical. Small differences often make an animal portrait feel more natural and full of personality.


About author










Add comment