
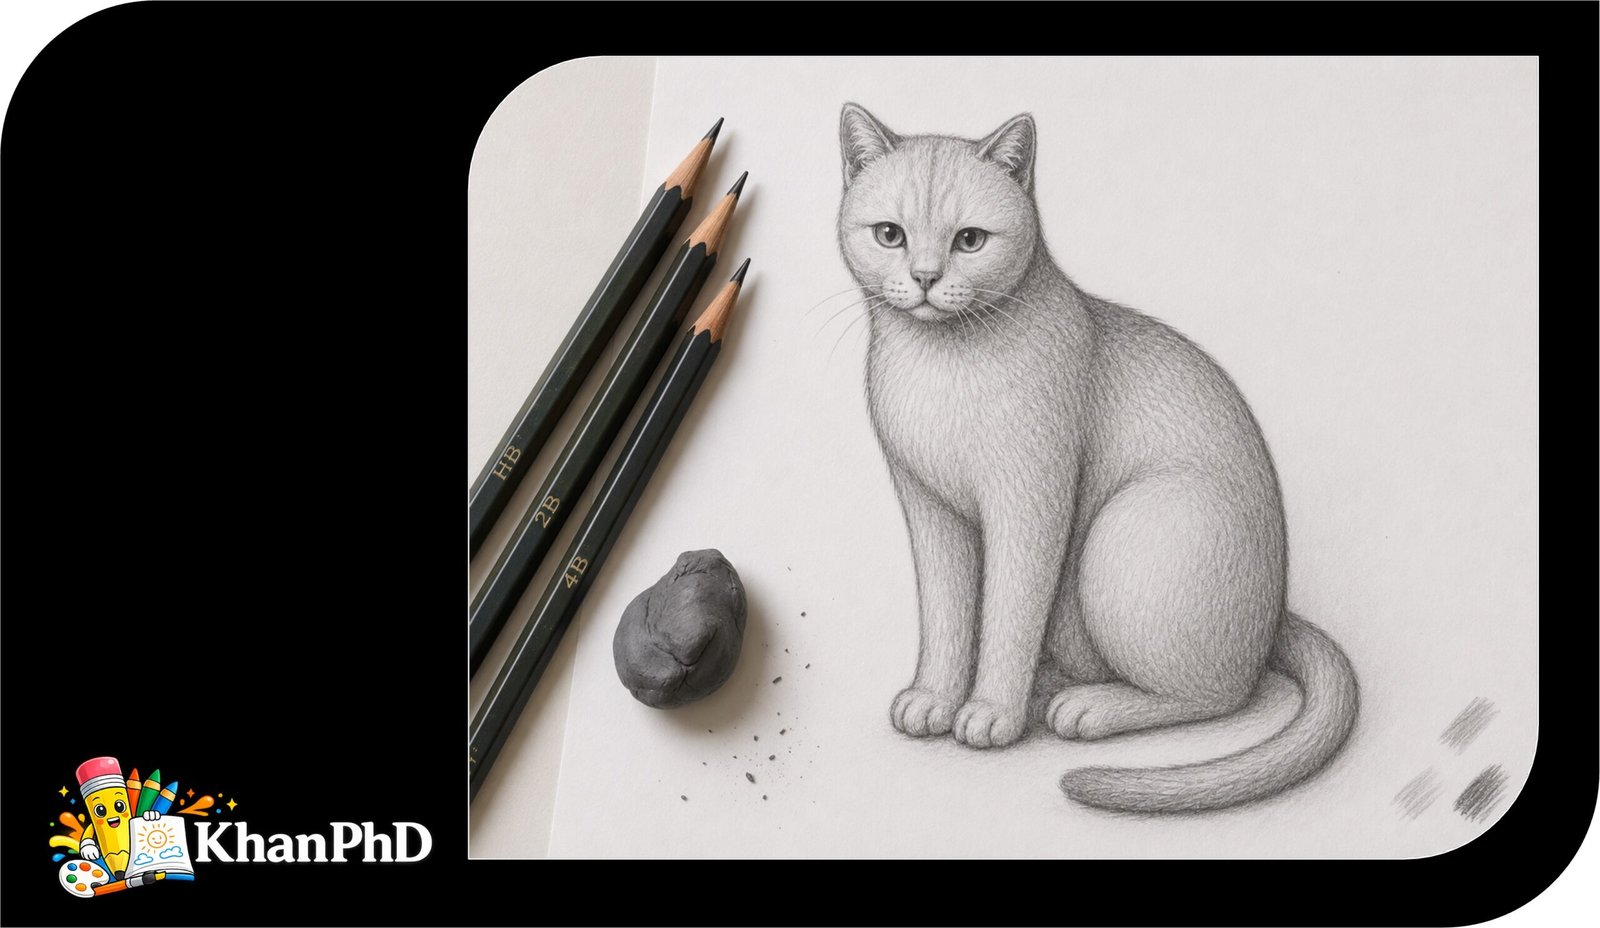
Realistic Cat Drawing in 06 Easy Steps
A realistic cat drawing can feel wonderfully alive: bright eyes, soft fur, delicate whiskers, and a body that looks ready to stretch or pounce. The good news is that you do not need “natural talent” or any previous drawing skill to make one. This lesson begins with simple circles and ovals, so even someone holding a pencil for drawing purposes for the first time can follow along.
You will use a clear six-step method: rough shapes → refine → details → shading → texture → final polish. Each stage builds on the last, and you can erase or adjust your drawing as often as needed. Your first cat does not have to be perfect. The goal is to observe carefully and improve one small area at a time.
Six-Step Tutorial To Draw Realistic Cat
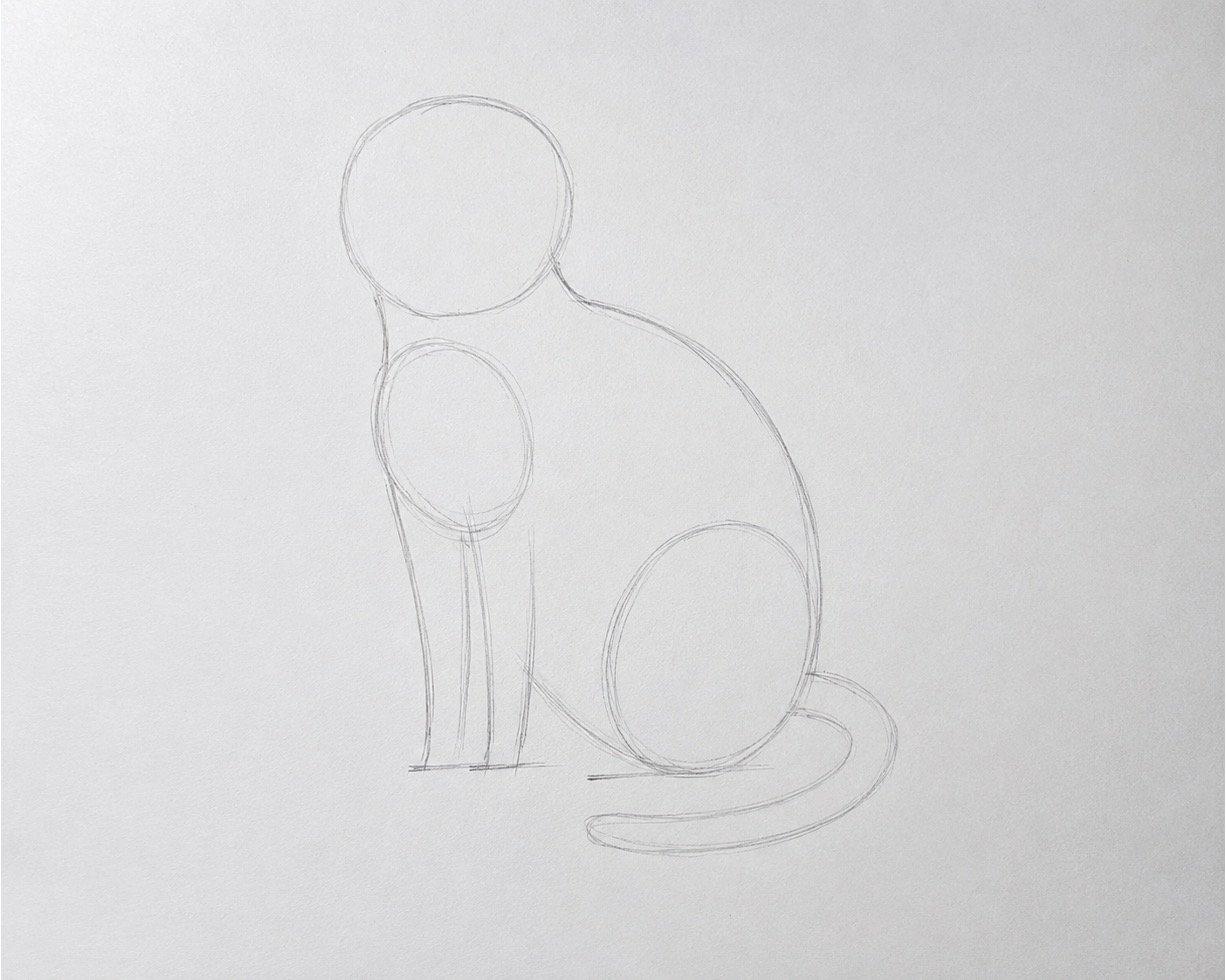
Step 1: Sketch the Basic Shapes
Goal: Build the cat’s pose and proportions before worrying about details.
Instructions:
Use an HB pencil and hold it lightly, without squeezing. Draw a small oval for the head and a larger egg or bean shape for the body. This is called blocking in, which simply means using basic shapes to plan the drawing. Add smaller ovals for the chest and back leg, then use simple lines to mark the front legs and tail. Check the proportions, meaning the sizes of the parts compared with one another.
Beginner tip:
Do not press hard or try to make the shapes perfect. These are temporary guide lines, so keep them pale enough to erase easily.
Step 2: Refine the Outline and Contour
Goal: Turn the separate guide shapes into one clear cat silhouette.
Instructions:
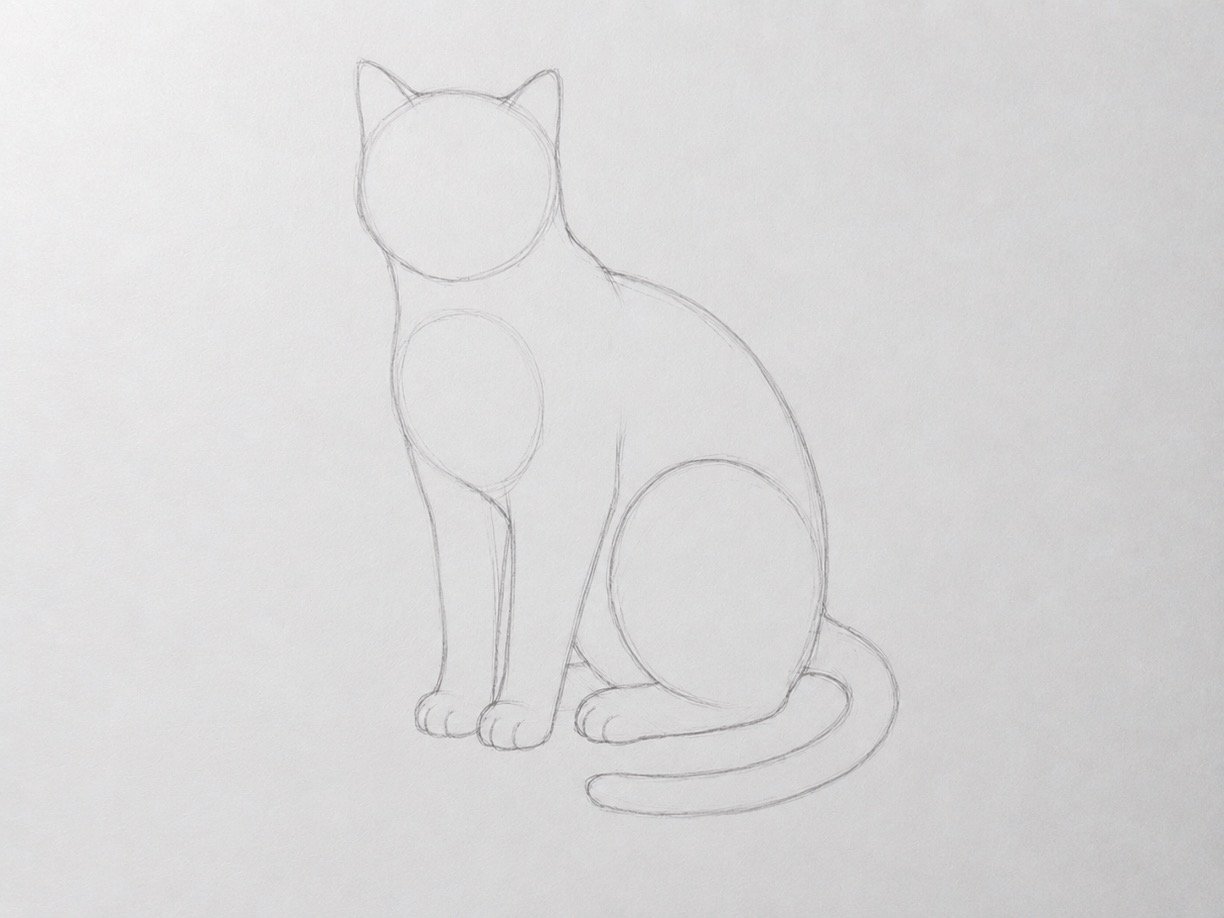
Still using the HB pencil, connect the head to the body with two gentle neck lines. Draw the curve of the back, chest, belly, legs, paws, and tail while looking closely at your reference photo. The outer edge of an object is called its contour. Use a few short, uneven strokes around furry areas instead of drawing one hard, perfectly smooth line. Lightly erase the parts of the original ovals that you no longer need.
Beginner tip:
A common mistake is outlining the entire cat with a thick, dark line. Keep the contour light because some edges will later disappear into fur or shadow.
Step 3: Add the Cat’s Features and Structure
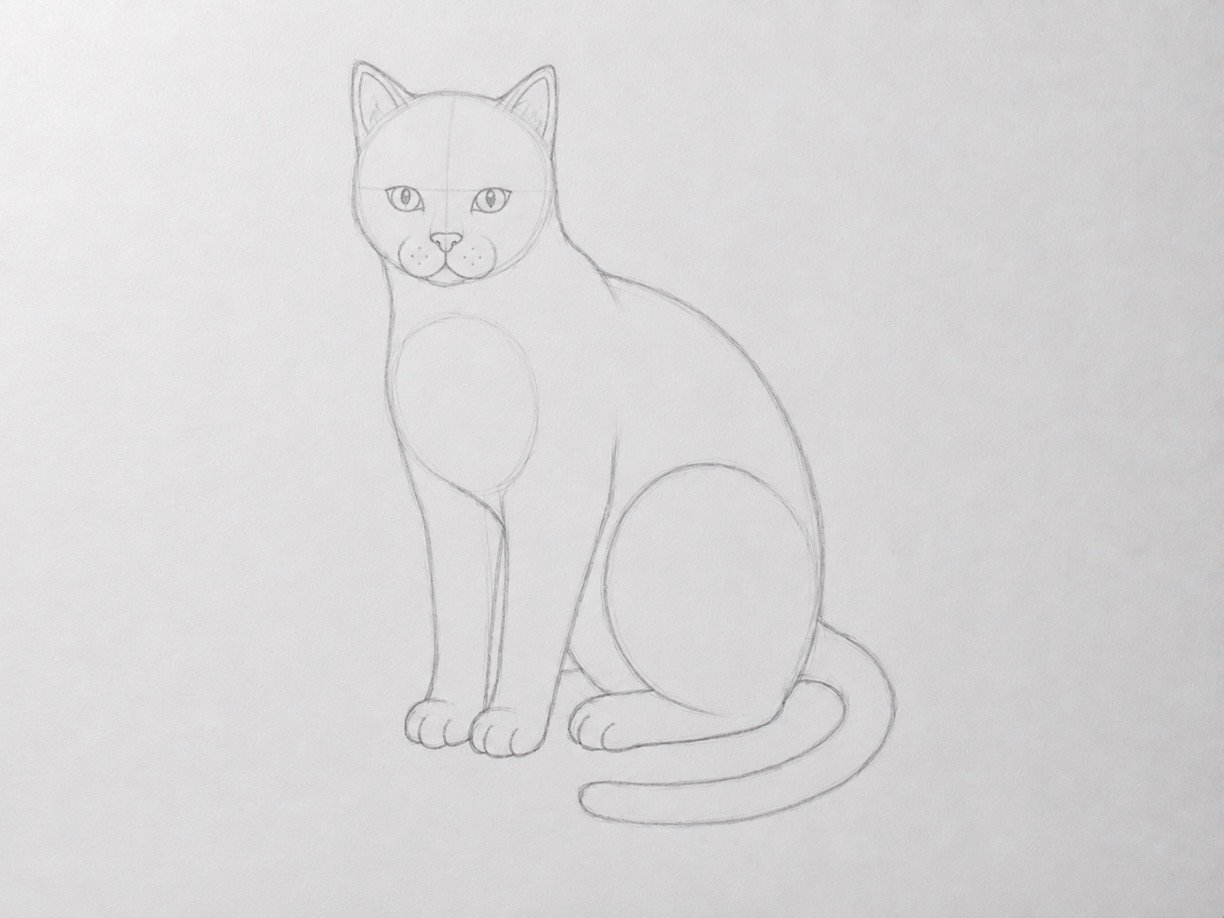
Goal: Place the eyes, ears, nose, muzzle, paws, and other features accurately.
Instructions:
Draw a faint vertical line down the center of the face and a horizontal guide across the eye area. Place two almond-shaped eyes on the horizontal line, remembering that the farther eye may appear slightly smaller. Add two triangular ears, but soften their corners and show where each ear connects to the head. Draw a small, rounded upside-down triangle for the nose, then add the muzzle curves, mouth, whisker spots, toes, and inner-ear shapes. Compare the spaces between the features instead of guessing their positions.
Beginner tip:
Do not draw the eyes too high on the head. A cat’s eyes usually sit near the middle of the head shape, not directly beneath the ears.
Step 4: Add Light, Mid-Tones, and Dark Shadows
Goal: Make the cat appear three-dimensional by showing how light falls across its form.
Instructions:
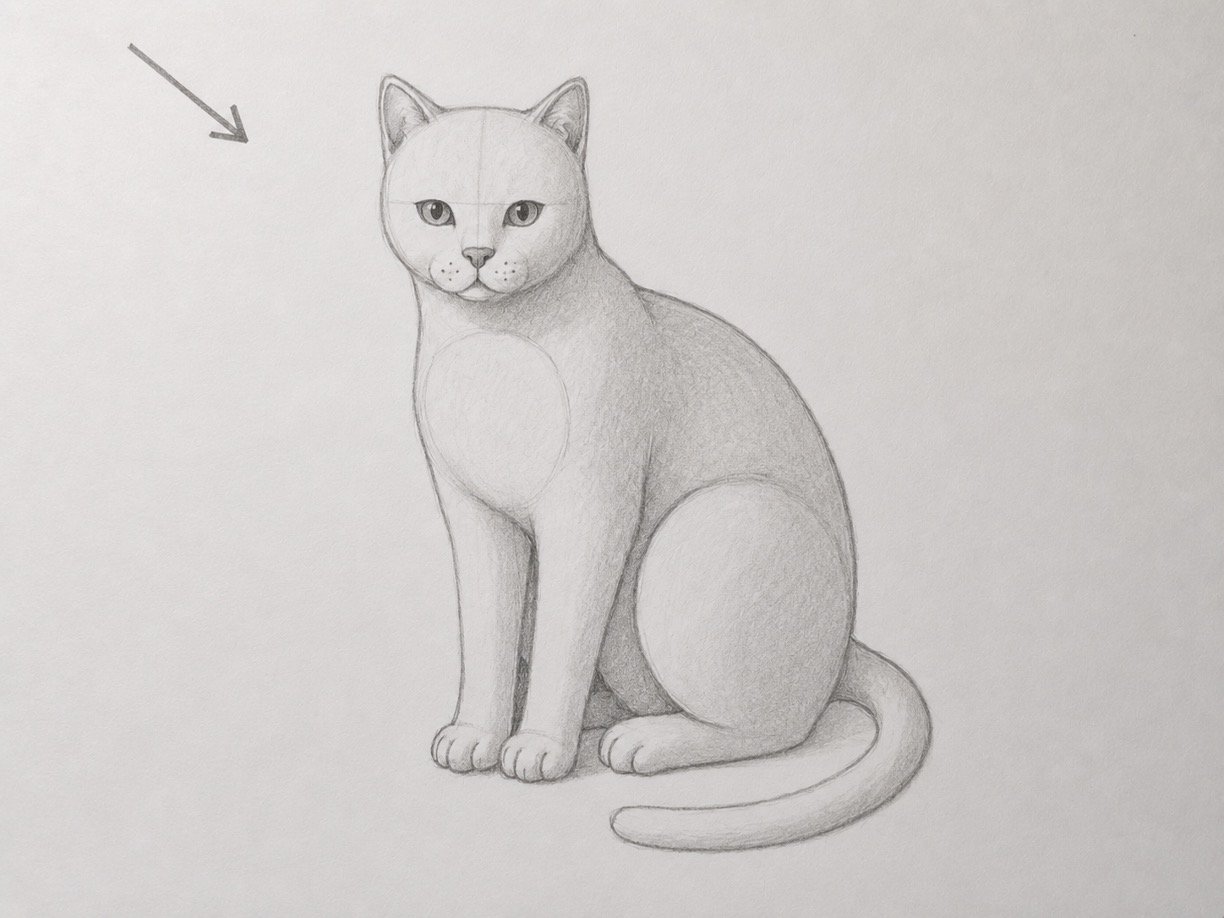
Choose one light source, meaning the direction the light is coming from; for this drawing, imagine it coming from the upper left. Value is the art term for how light or dark an area appears. Leave the lightest areas mostly white, use an HB pencil for pale shadows, and use a 2B pencil for mid-tones, which are the middle values between light and dark. Shade more deeply beneath the chin, inside the ears, under the body, between the legs, and on the side facing away from the light. Use the 4B pencil carefully for the pupils, nostrils, and deepest shadow gaps.
Beginner tip:
Avoid making every part of the cat the same gray. Keep a clear difference between the light, middle, and dark areas.
Step 5: Build the Fur Texture
Goal: Create believable fur without drawing every individual hair.
Instructions:
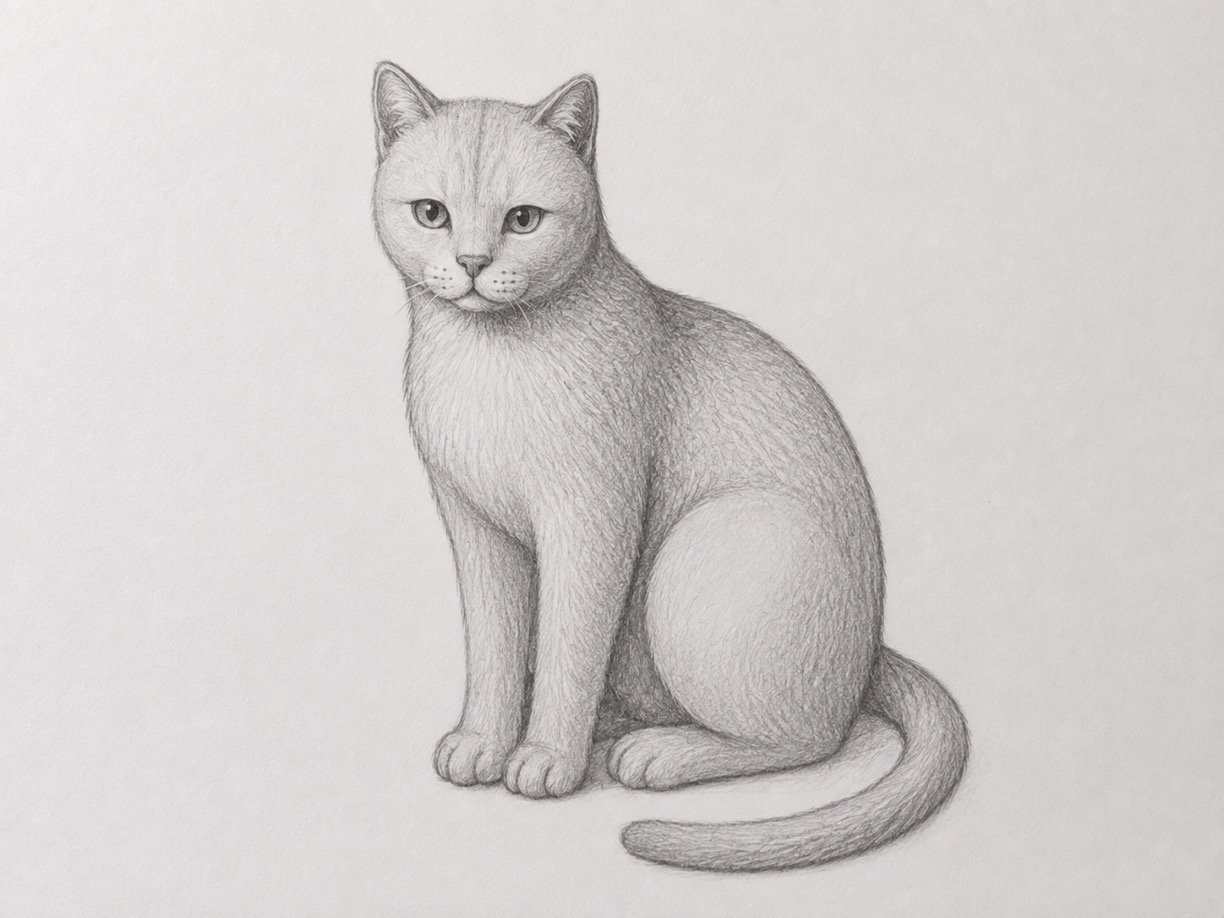
Sharpen the 2B pencil and study the direction in which the cat’s fur grows. Use short strokes around the face, nose, and paws, then slightly longer strokes along the chest, body, and tail. Layer the strokes gradually, leaving small gaps so some lighter paper continues to show. Follow the curves of the body so the fur helps describe its rounded form. Add darker stripes or markings with the 4B pencil only where they appear in your reference.
Beginner tip:
Do not cover the cat with random scribbles. Fur looks more realistic when the strokes follow a consistent direction and change length across the body.
Step 6: Add Highlights, Whiskers, and Final Polish
Goal: Strengthen the most important details and give the finished drawing a clean, lively appearance.
Instructions:
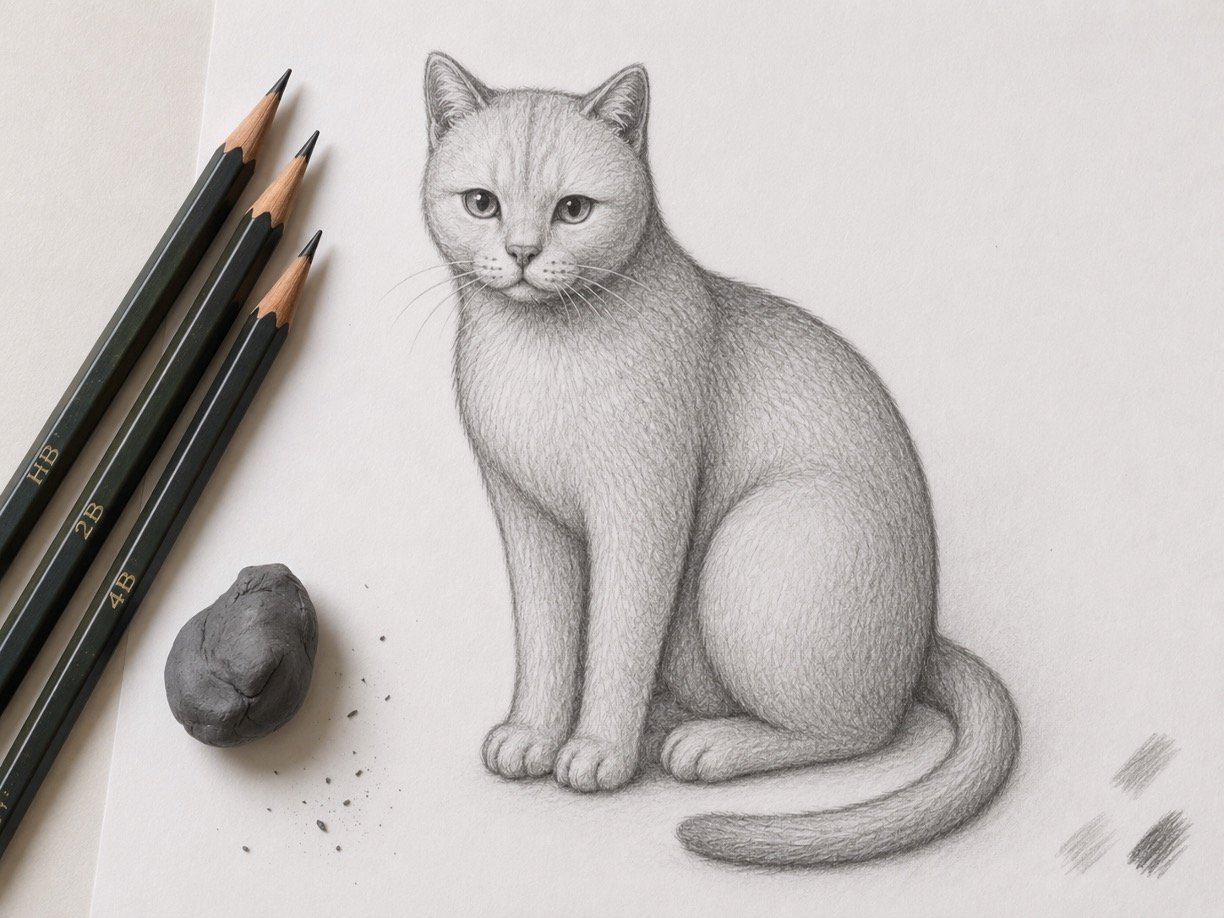
Use a tissue, cotton swab, or blending stump to gently soften only the broad shadow areas. Blending means smoothing pencil marks together, but too much blending can remove the fresh look of the fur. Pinch a kneaded eraser into a small point and lift out highlights—the brightest areas—in the eyes, nose, ears, and shiny sections of fur. Deepen the pupils, nostrils, mouth line, and a few shadow areas with the 4B pencil. Add whiskers with quick, confident strokes, beginning at the muzzle and moving outward.
Beginner tip:
Stop before every area becomes dark and overworked. Step back from the drawing occasionally; the strongest details should be around the eyes and face, not equally sharp everywhere.

About author










Add comment