
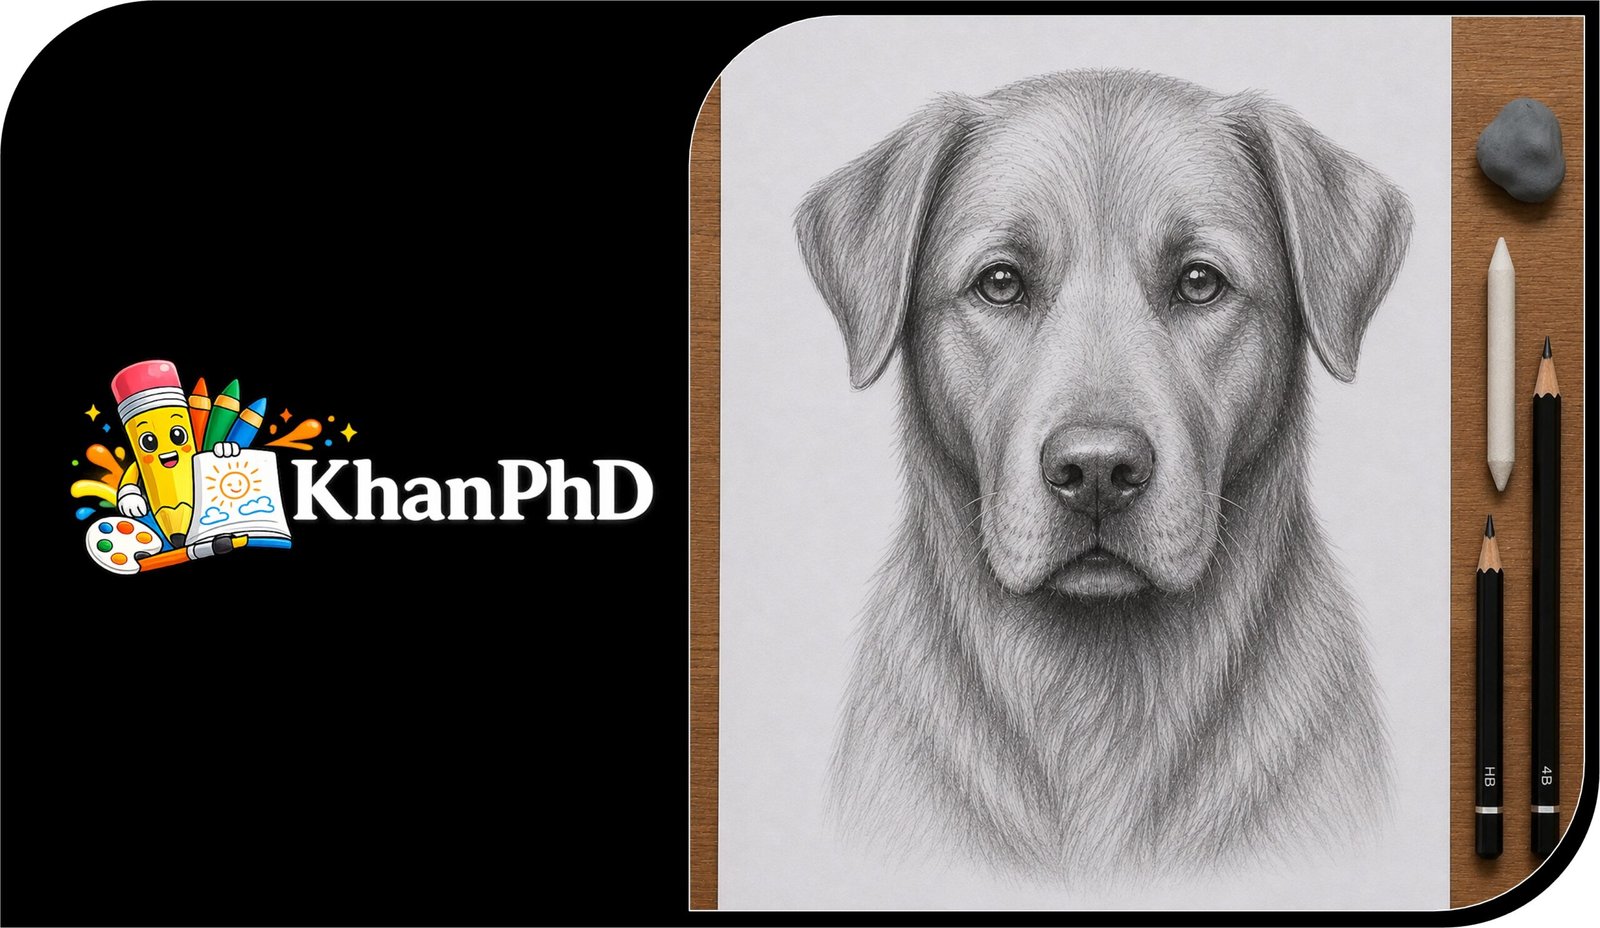
Realistic Dog Drawing Even If You’re a Beginner
Drawing a realistic dog is deeply satisfying because a few simple pencil marks can slowly become a face full of expression, soft fur, and personality. The good news is that you do not need natural talent, previous lessons, or even experience holding a pencil for art. This tutorial starts at the very beginning and explains exactly what to look for, where to place each line, and how lightly to press.
You will work through six clear stages: rough shapes → refine → details → shading → texture → final polish. Instead of trying to draw the whole dog at once, you will build a simple, front-facing dog portrait one manageable part at a time.
You only need a small set of supplies:
- An HB pencil for light sketching and a 2B or 4B pencil for darker shading
- A soft eraser, plus a kneaded eraser if available for lifting small highlights
- Plain, uncoated drawing or printer paper
- A blending stump, folded tissue, or clean cotton swab
Choose a clear reference photo with the dog facing mostly forward and with visible light and shadow. A short-haired dog is often easiest for a first attempt because the head shape is easier to see, but the same method works for long-haired dogs too.
Set aside about 45–60 minutes. You can pause at any stage, and your drawing does not need to match the reference perfectly. The goal is to learn how simple shapes, careful observation, and gentle shading work together to create a believable dog.
1. REALISTIC DOG DRAWING EVEN IF YOU’RE A BEGINNER
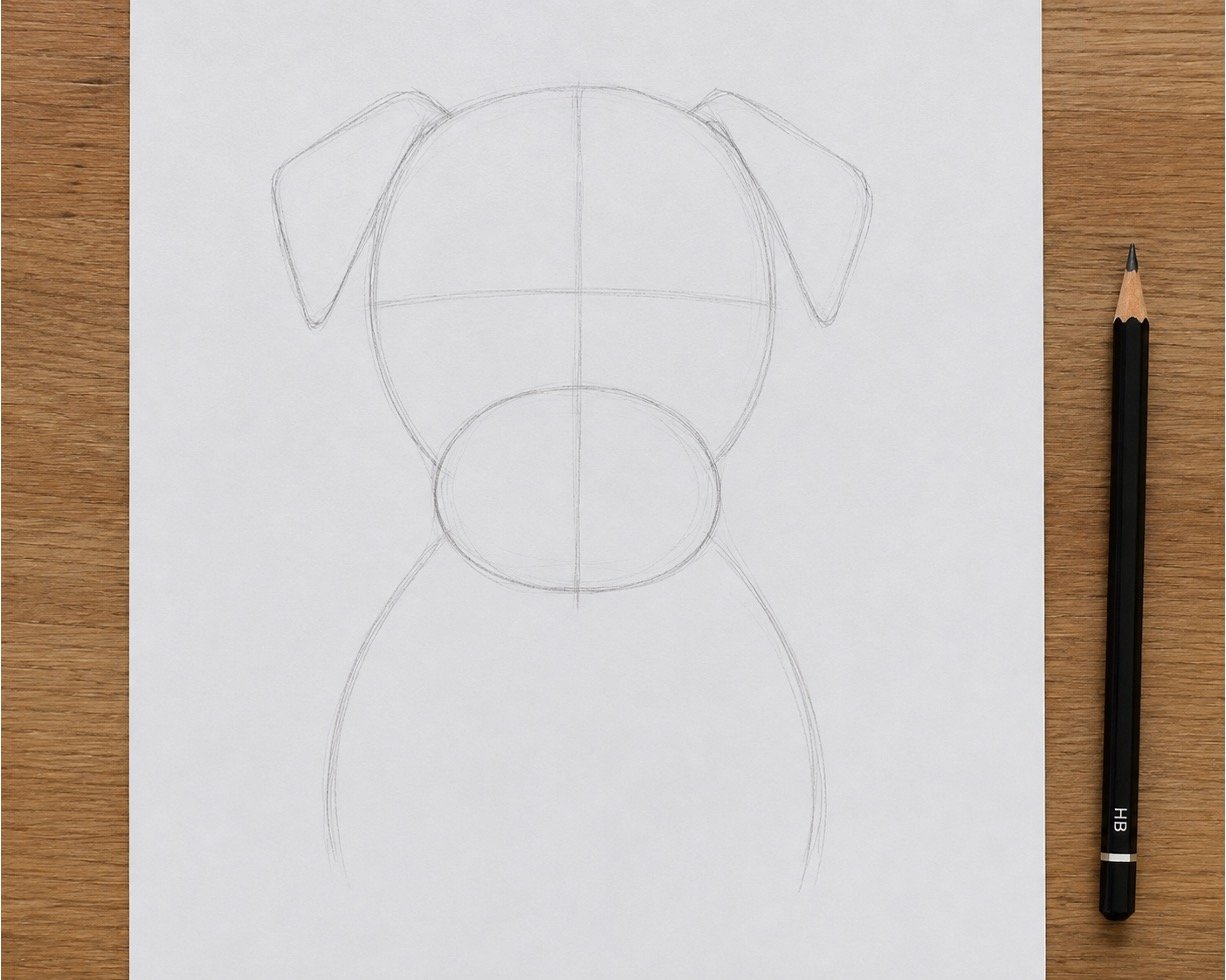
Step 1: Sketch the Basic Shapes
Goal: Build a light framework that places the dog’s head, muzzle, ears, and chest in the correct proportions.
Instructions:
Use an HB pencil and press so lightly that the lines are only just visible. Draw a large oval for the head, followed by a smaller oval for the muzzle near the lower half of the face. Add a vertical line through the center of the head and a horizontal line where the eyes will sit. Use simple triangles, ovals, or floppy leaf shapes for the ears, then add two curved lines for the upper chest.
Beginner tip: A common mistake is pressing hard because you want the shapes to look clear. Keep them pale so they can be erased or adjusted without leaving dark marks.
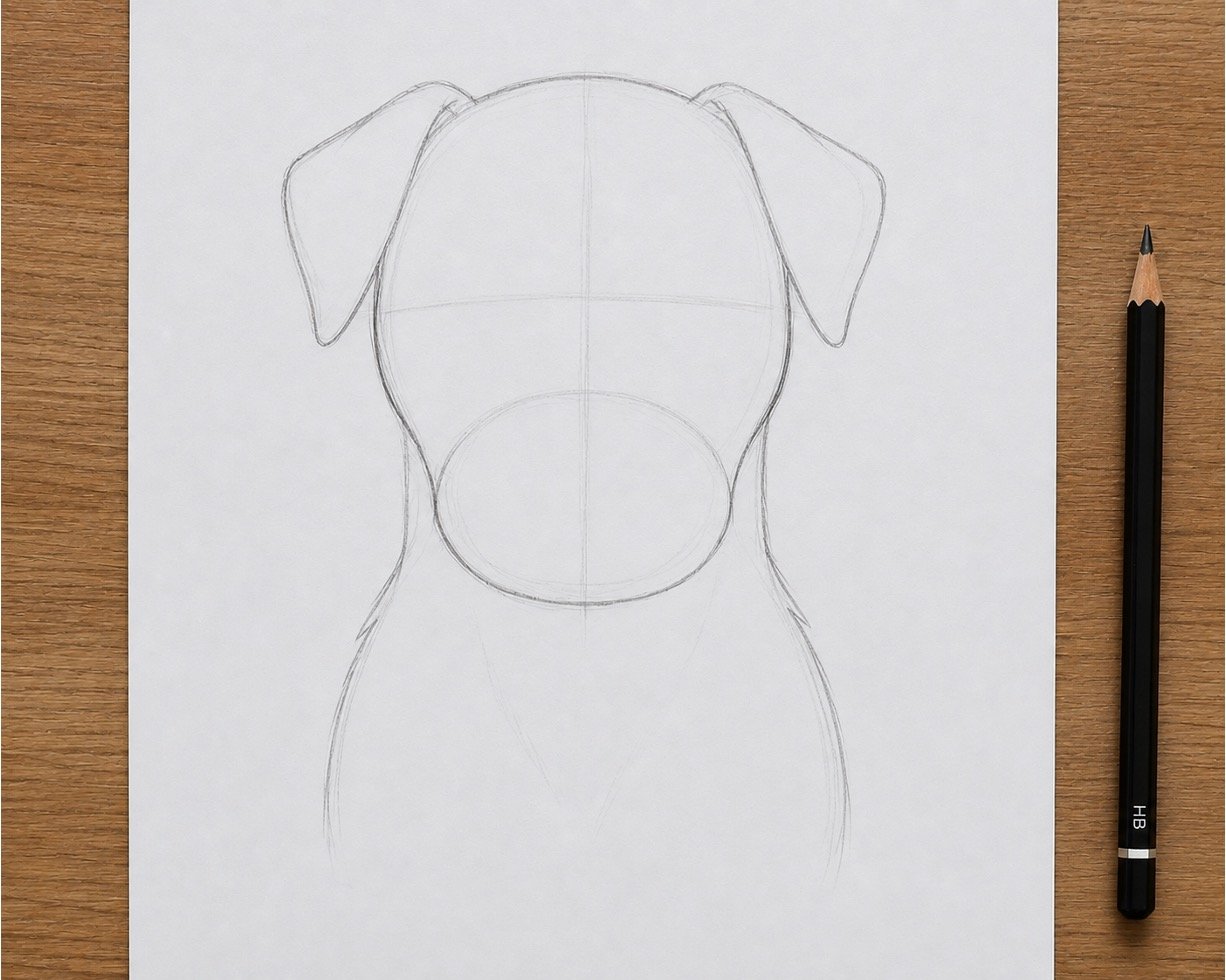
Step 2: Refine the Outline and Contour
Goal: Turn the rough shapes into a recognizable dog silhouette while correcting the size and placement of each feature.
Instructions:
A contour is the visible outer edge of an object. Study your reference photo and draw a smoother contour around the skull, cheeks, ears, muzzle, and chest. Connect the original shapes with gentle curves instead of tracing every construction line. Check whether both sides of the head are reasonably balanced, then erase the parts of the original ovals that you no longer need.
Beginner tip: Do not make the outer edge one heavy, unbroken line. Use light, slightly broken lines so the outline can later blend naturally into the fur.
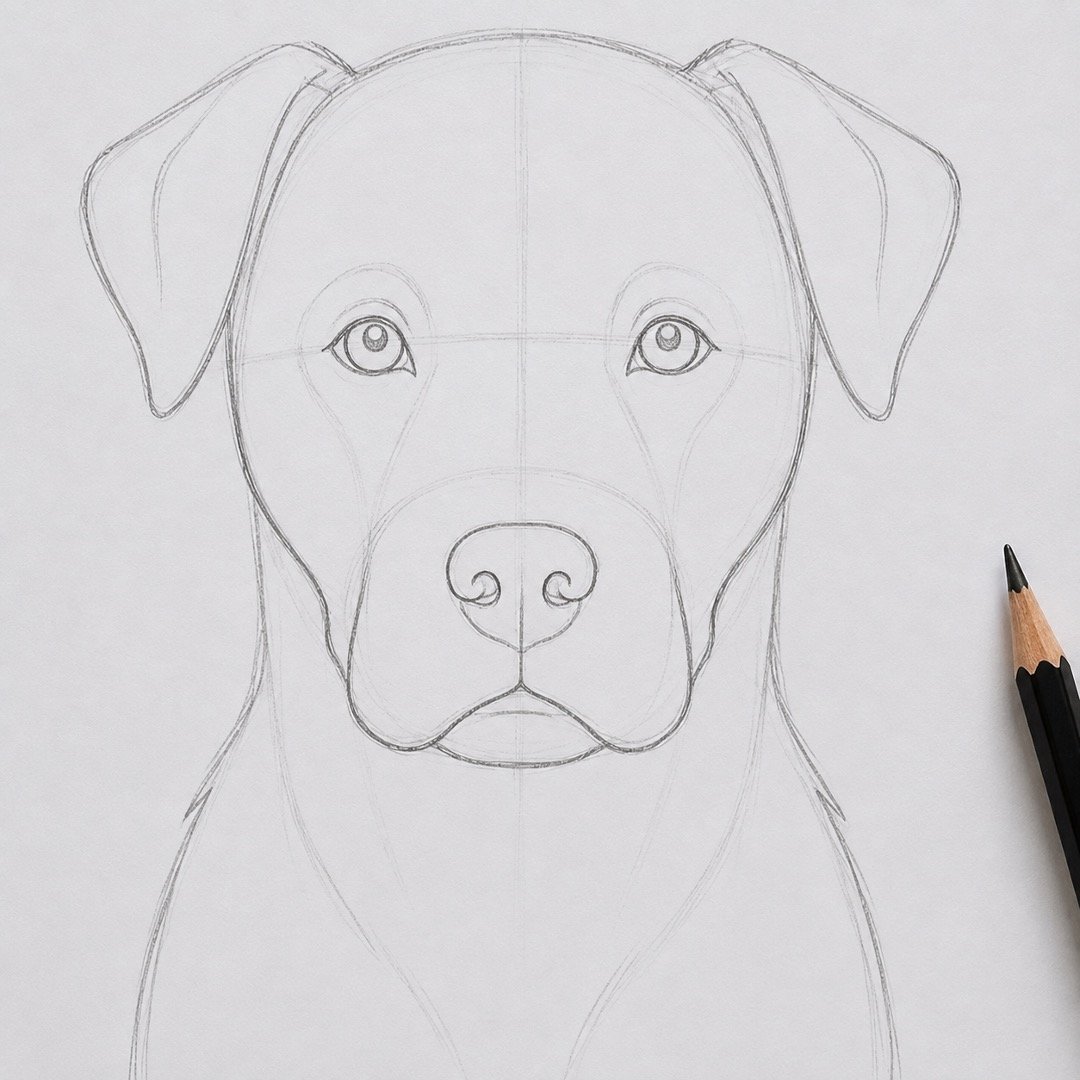
Step 3: Place the Eyes, Nose, Ears, and Muzzle
Goal: Add the structural details that create the dog’s expression and make its face believable.
Instructions:
Place the eyes along the horizontal guideline, checking your reference because eye spacing differs between breeds. Outline each eye with small curved shapes, then add the pupils while leaving a tiny white reflection spot. Draw the nose as a softly rounded triangle or oval and connect it to the mouth with a short center line. Add the nostrils, lower lip, inner ear shapes, and the subtle curves where the muzzle meets the cheeks.
Beginner tip: Beginners often draw the eyes too large or too high. Compare each eye with the width of the nose and adjust it before making any line dark.
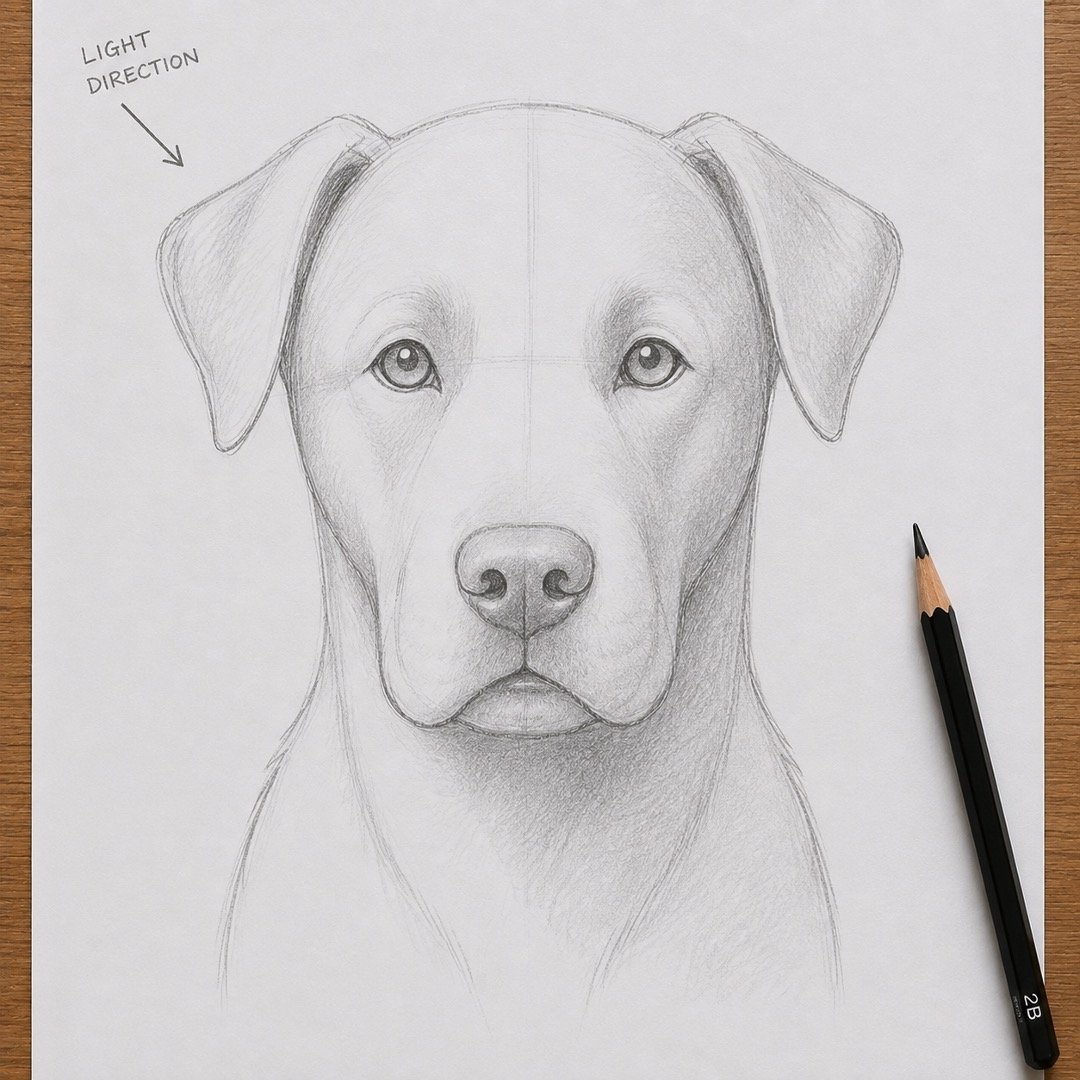
Step 4: Add the Main Light and Shadow Shapes
Goal: Give the dog’s head a three-dimensional form using light, middle, and dark areas.
Instructions:
Decide which direction the light is coming from by finding the brightest side of the reference photo. In drawing, value means how light or dark an area appears. Use an HB or 2B pencil with gentle pressure to add middle values around the eye sockets, beneath the muzzle, inside the ears, and on the shadowed side of the head. Make the pupils, nostrils, and deepest ear shadows darker, but leave the brightest fur and eye reflections white.
Beginner tip: Do not shade every area equally. Squint at the reference to simplify it into three groups—light, middle, and dark—before adding small details.
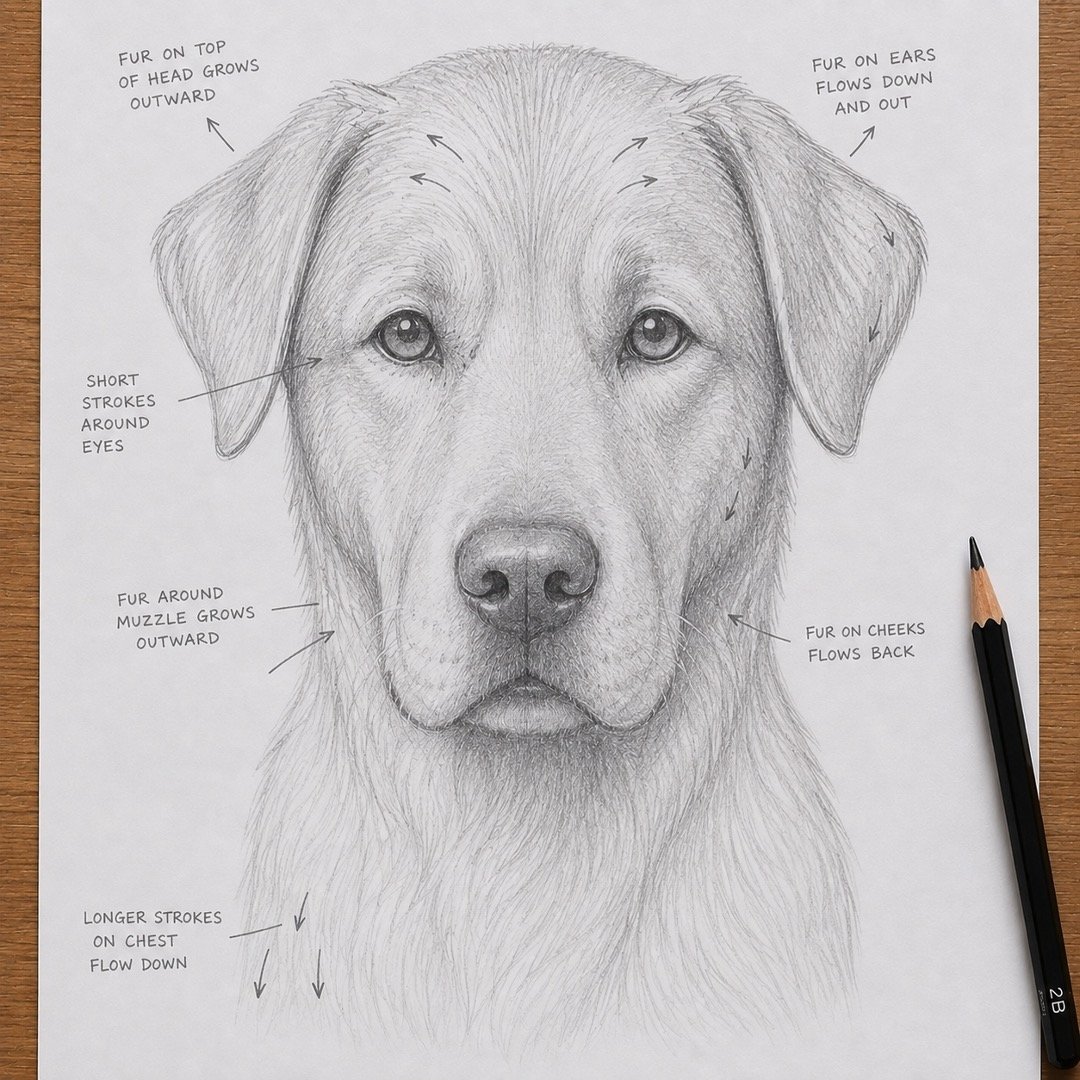
Step 5: Build the Fur Texture
Goal: Create believable fur by following its direction, length, and natural changes across the dog’s face.
Instructions:
Texture is the visual quality that makes a surface appear soft, rough, smooth, or furry. Use a sharp HB or 2B pencil to draw short, tapered strokes that follow the direction of hair growth. Work outward from the nose, curve strokes around the eyes and cheeks, and change the stroke length for longer hair on the ears or chest. Leave small gaps between groups of strokes so the fur does not become a solid block of graphite.
Beginner tip: Avoid filling the entire dog with quick zigzags or identical straight lines. Build the fur in small sections and regularly look back at the reference to check its direction.
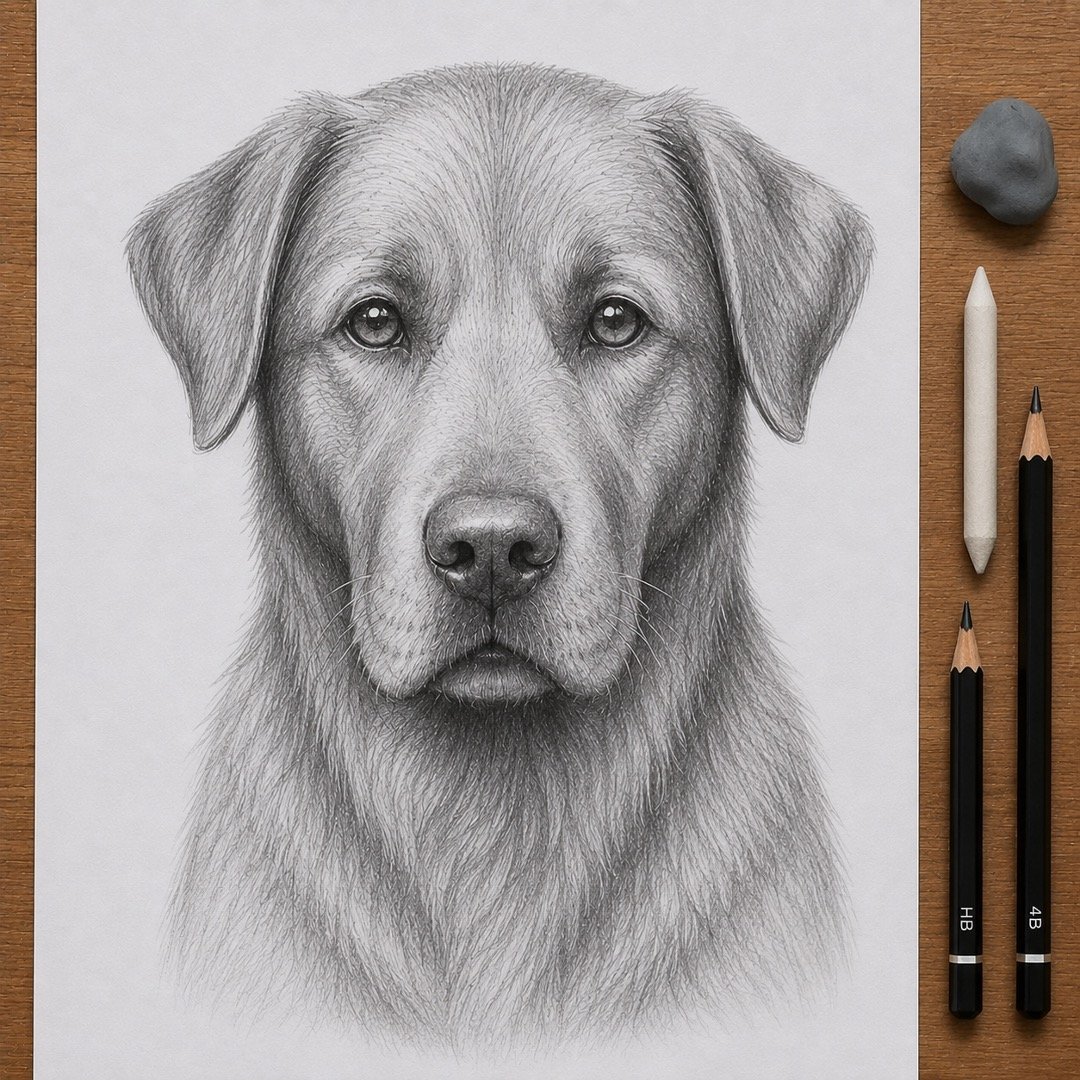
Step 6: Blend, Add Highlights, and Polish the Drawing
Goal: Strengthen the contrast, soften selected shadows, and add the final details that make the dog look lifelike.
Instructions:
Gently blend broad shadow areas with a blending stump, folded tissue, or clean cotton swab, but do not rub across every fur stroke. Use a kneaded eraser or the clean corner of a regular eraser to lift highlights from the eyes, nose, forehead, and bright strands of fur. Deepen the pupils, nostrils, mouth, and darkest shadows with a 4B pencil or firmer pressure from your 2B pencil. Finish by softening unnecessary outline marks and checking the drawing from a few steps away.
Beginner tip: Too much blending can make the dog look blurry or plastic. Blend only the smooth shadow areas and redraw a few crisp fur strokes on top afterward.


About author










Add comment