

Easy Realistic Colourful Flowers Drawing Tutorial
Welcome! If you have never drawn flowers before—or you usually feel nervous when you see detailed petals—this tutorial is made for you. We will build the picture slowly from simple circles, ovals, and curved lines, so there is no need to draw anything perfectly on the first try. By the end, you will have a realistic, colourful arrangement featuring a soft pink rose in the centre, a sunny yellow daisy on the left, a purple tulip on the right, and fresh green leaves tying the composition together.
You will need a regular pencil for the first sketch, an eraser, smooth white drawing paper, and either coloured pencils or paints. Coloured pencils are especially beginner-friendly because they let you add colour gradually and correct small areas easily. Choose pink, red, yellow, orange, purple, blue, light green, dark green, brown, and white. A blending tool, such as a paper stump, cotton bud, or colourless blending pencil, will help soften transitions, but it is optional. Keep a scrap piece of paper nearby for testing colours and pencil pressure.
Plan for about 60 to 90 minutes, although you can pause at any stage and continue later. The tutorial is divided into eight clear steps, beginning with faint guidelines and ending with rich colour, soft shadows, highlights, and polished details. Work gently, take your time, and remember that realistic drawing comes from patient observation and layering—not from getting every line right immediately.
EASY REALISTIC COLOURFUL FLOWERS DRAWING TUTORIAL
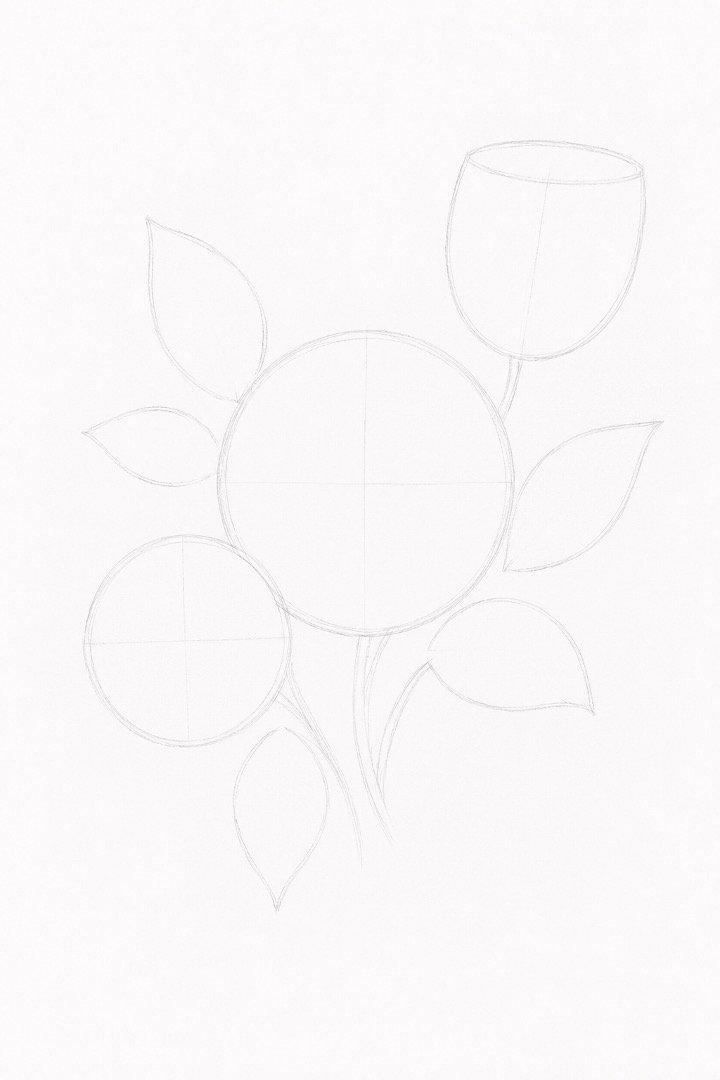
Step 1: Sketch the Basic Shapes
Use a regular pencil with very light pressure so your guidelines will be easy to erase later. Draw a medium-sized circle for the central rose, a slightly smaller circle on the lower left for the daisy, and a rounded cup or egg shape on the upper right for the tulip. Add five loose leaf shapes around the flowers and lightly mark the direction of the short stems. Check that the flowers overlap slightly without covering one another completely.
Step 2: Refine the Outline and Proportions
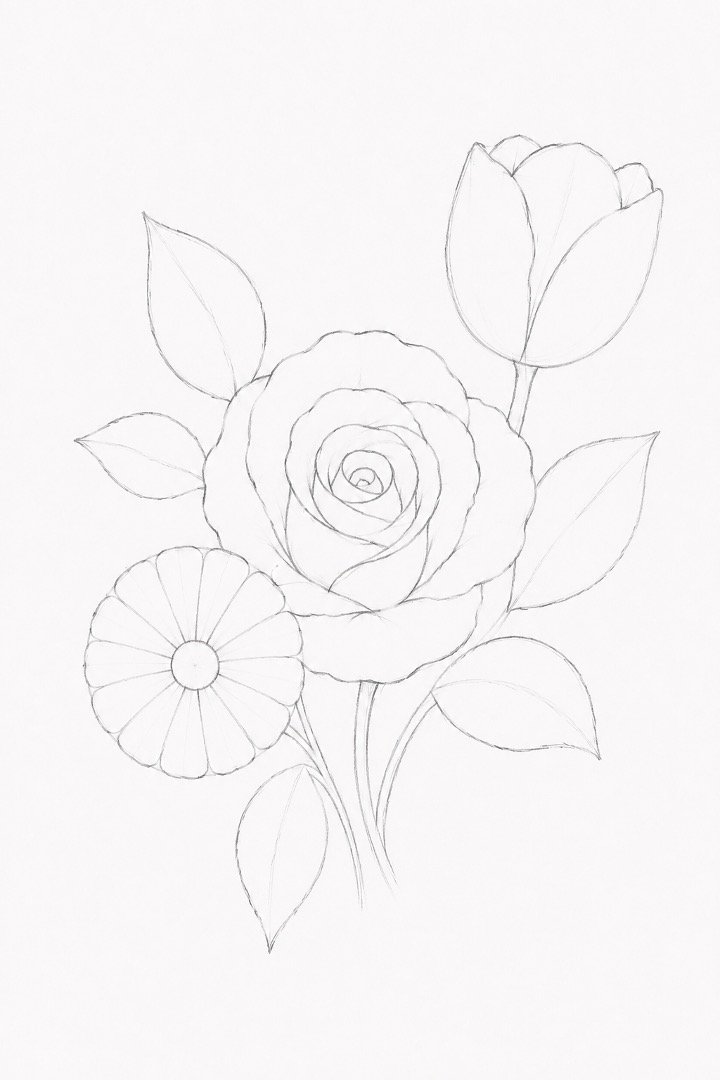
Begin turning the simple guidelines into cleaner flower shapes while keeping your pencil pressure gentle. Give the rose a softly uneven outer edge, divide the daisy circle into evenly spaced petal sections, and shape the tulip into three large overlapping outer petals. Refine the leaves so they taper to natural-looking points and vary their sizes slightly. Erase any guidelines that extend far beyond the new outlines, but leave the useful centre marks in place.
Step 3: Add the Major Details
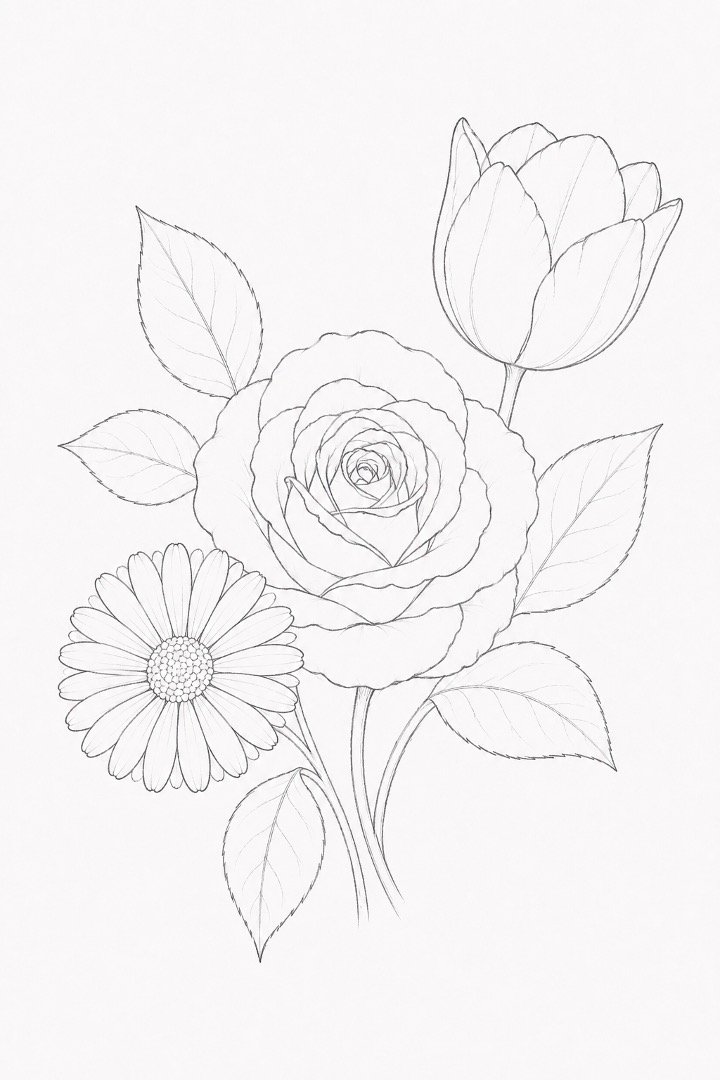
Draw a small curled spiral near the centre of the rose, then build curved petals around it in widening layers. Give the daisy a round centre and draw long, narrow petals radiating outward, allowing a few petals to overlap. Add two inner petals to the tulip and draw a light centre vein along each leaf. Keep the details clear but simple; you do not need to copy every tiny fold found in a real flower.
Step 4: Lay Down the Light Colours
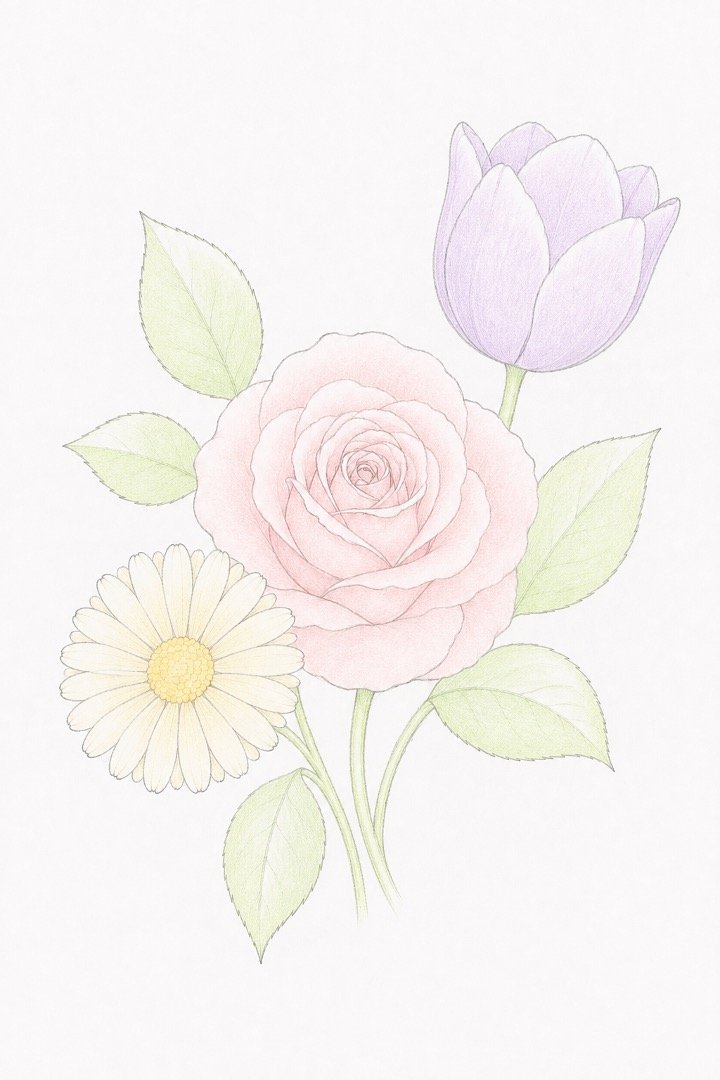
Erase the darkest graphite marks until the outline is only faintly visible beneath the colour. Using very light pressure, cover the rose with pale pink, the daisy petals with soft cream, and the tulip with light lavender. Add pale yellow to both flower centres and use light green across the leaves and stems. Leave small areas of white paper showing on the upper parts of the petals, as these will become natural highlights later.
Step 5: Build the Mid-Tones
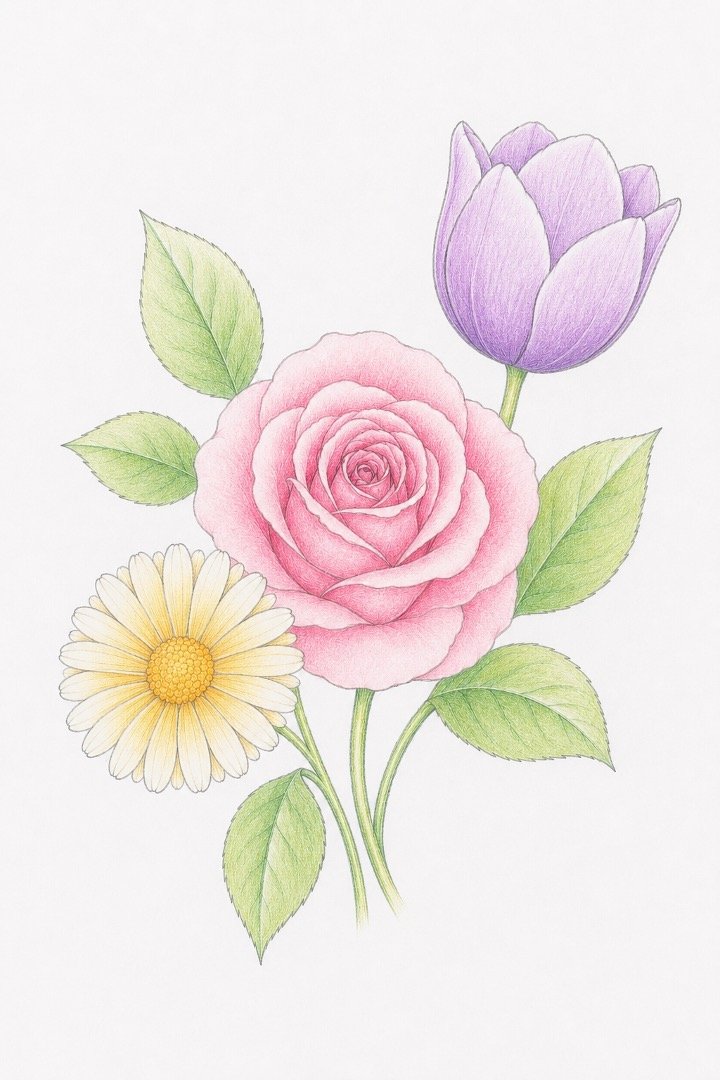
Add a second layer of colour using small, controlled strokes that follow the direction of each petal. Place medium pink inside the rose’s folds, warm yellow near the base of the daisy petals, and medium purple along the lower half of the tulip. Layer medium green near the centre veins and lower edges of the leaves. Keep the upper-facing petal edges lighter so the flowers begin to look rounded rather than flat.
Step 6: Deepen the Shadows
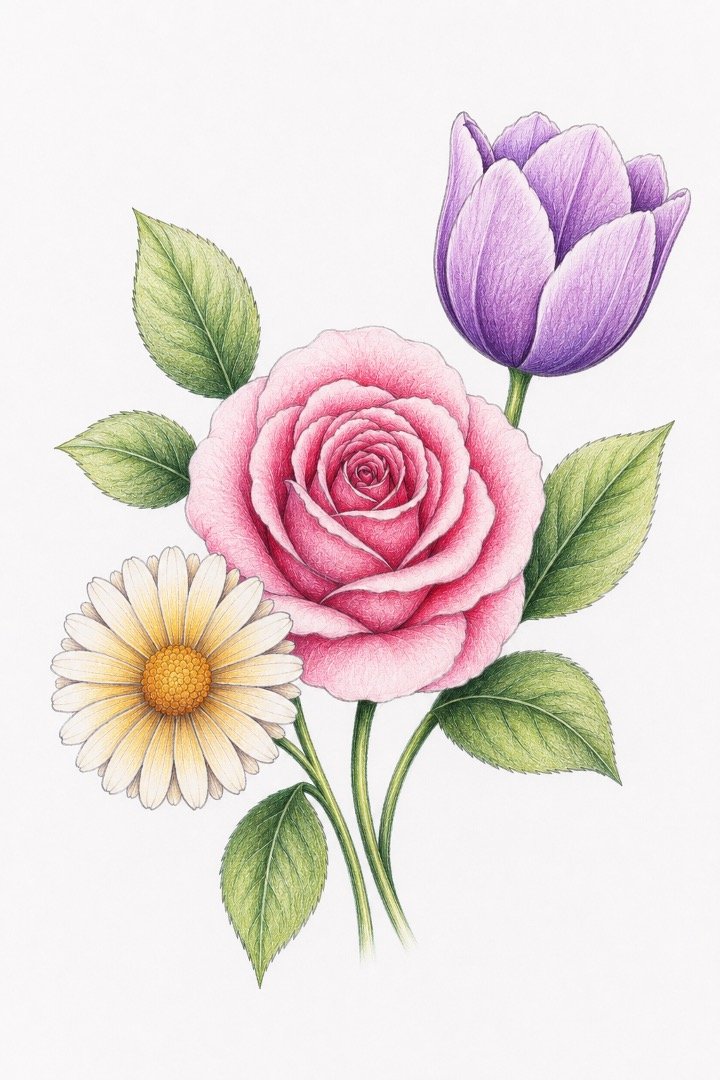
Use dark pink or a small amount of red in the deepest spaces between the rose petals. Add orange-brown dots and short marks to the daisy centre, then place soft grey-violet shadows where its petals overlap. Deepen the tulip with dark purple near its base and between the inner petals. Use dark green sparingly beneath overlapping flowers, along the lower sides of leaves, and where the stems disappear into the bouquet.
Step 7: Add Highlights and Fine Details
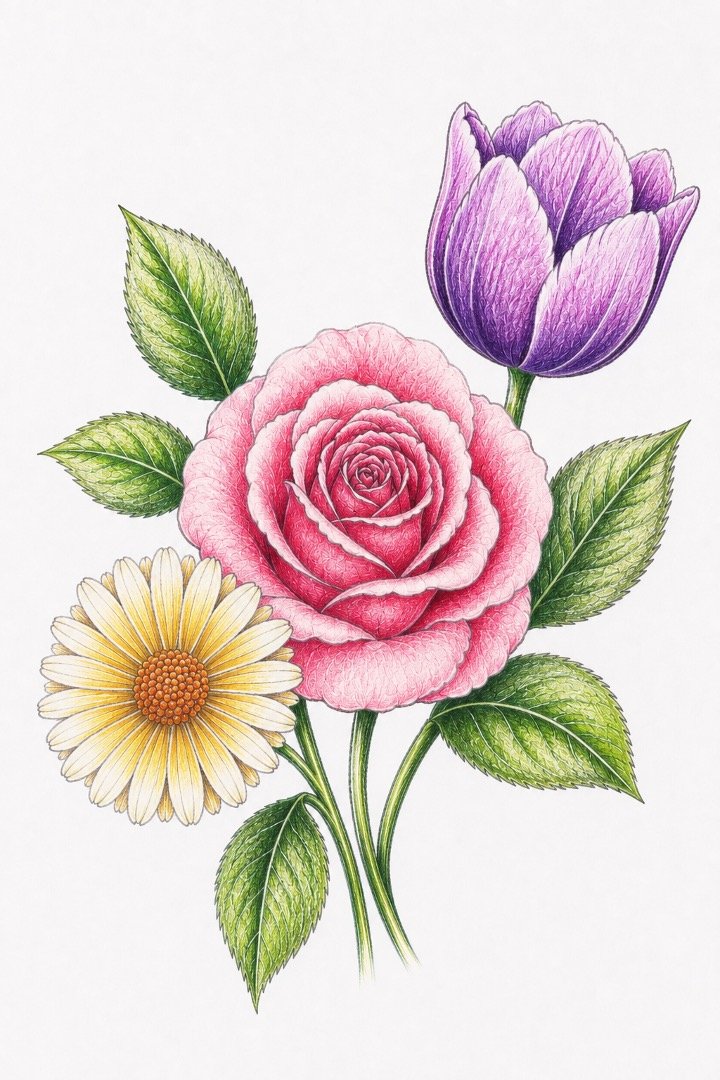
Sharpen your pencils before working on the smallest details. Add fine curved lines to selected rose petals, tiny dots and short strokes in the daisy centre, and delicate vertical colour streaks on the tulip. Draw thin side veins branching from the main veins of the leaves, but avoid making every vein equally dark. Restore bright highlights with a white coloured pencil or carefully lift small areas of colour with a clean eraser.
Step 8: Blend and Polish the Drawing
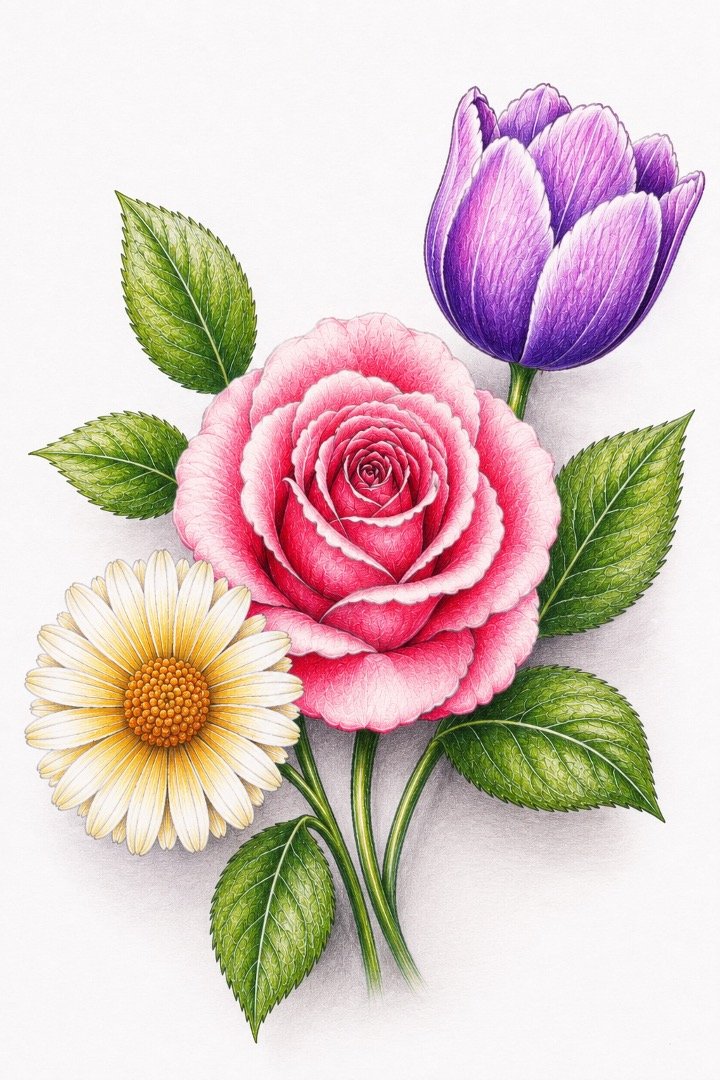
Step back and look at the whole drawing before adding anything else. Smooth rough colour transitions with a colourless blending pencil, white pencil, or very light layers of the neighbouring colours. Strengthen only a few important dark areas, such as the rose centre, the tulip base, and the spaces beneath overlapping leaves. Clean the surrounding paper with your eraser, soften any outlines that look too harsh, and add a faint grounding shadow beneath the bouquet to finish the artwork.
TIPS
- Keep your first sketch light. Dark guidelines can be difficult to hide beneath pale flower colours.
- Build colour gradually instead of pressing hard immediately; several gentle layers usually look smoother and more realistic.
- Do not worry about making every petal identical. Small differences in shape and direction help flowers look natural.
- Practise individual petals and leaves on scrap paper, and remember that patience is part of the drawing process.


About author










Add comment