
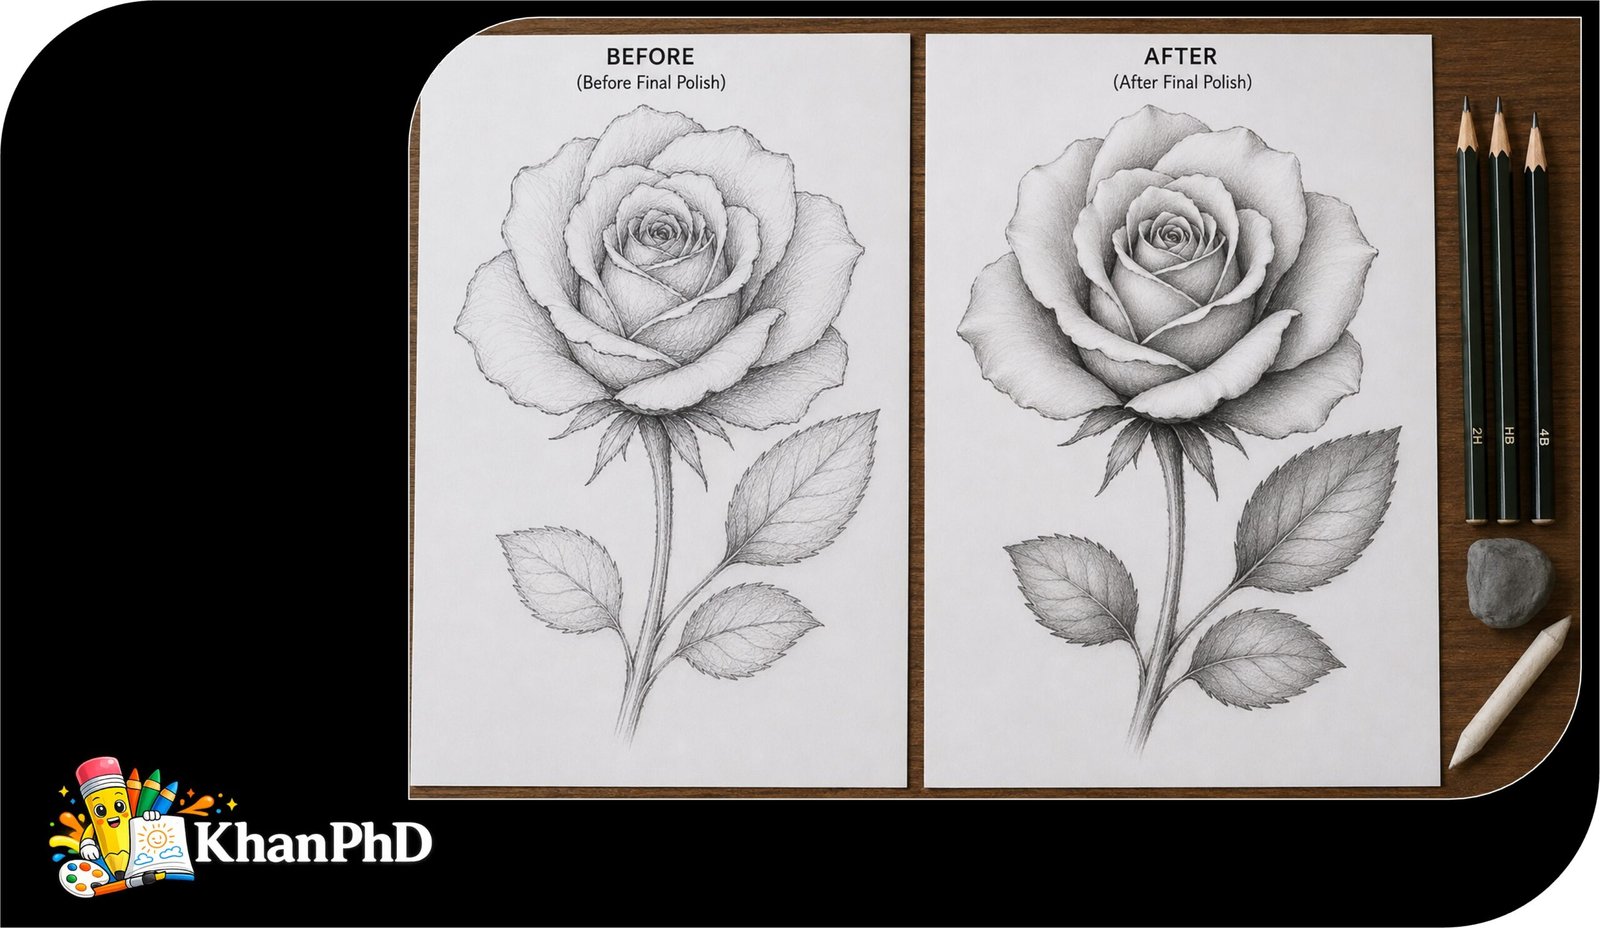
Realistic Rose Drawing With Zero Experience
A realistic rose may look complicated because it contains many overlapping petals, but that complexity is exactly what makes the finished drawing so satisfying. The good news is that you do not need to understand every petal before you begin. You will build the flower slowly, starting with a few simple shapes and adding information only when you are ready.
This tutorial is made for complete beginners. Zero drawing skill is required, and uneven lines are not a failure—they are part of learning how your pencil moves. Work lightly, pause often, and remember that a believable rose comes from careful layering rather than perfect lines.
The six-step method is simple: rough shapes → refine → details → shading, which means adding light and dark areas → texture, or surface detail → final polish.
Materials:
- One H or 2H pencil for pale guide lines. Graphite is the gray drawing material inside the pencil, and “H” pencils contain harder graphite that makes lighter marks.
- One HB pencil for everyday sketching.
- One 2B or 4B pencil for darker shadows. “B” pencils are softer and make deeper marks.
- A regular eraser and, when available, a kneaded eraser—a soft, moldable eraser used to lift graphite gently.
- Smooth or medium-texture drawing paper.
- A blending stump, cotton swab, or folded tissue for gently softening pencil marks.
Plan on about 45–60 minutes for your first rose. It is fine to take longer or split the drawing across two sessions. By the end, you will have practiced shape, relative size, shading, and detail while creating a rose that feels three-dimensional and realistic.
1. REALISTIC ROSE DRAWING WITH ZERO EXPERIENCE
Step 1: Sketch the Basic Shapes
Goal: Create a light framework that establishes the rose’s size, position, and proportions—the size relationships between its different parts.
Instructions:
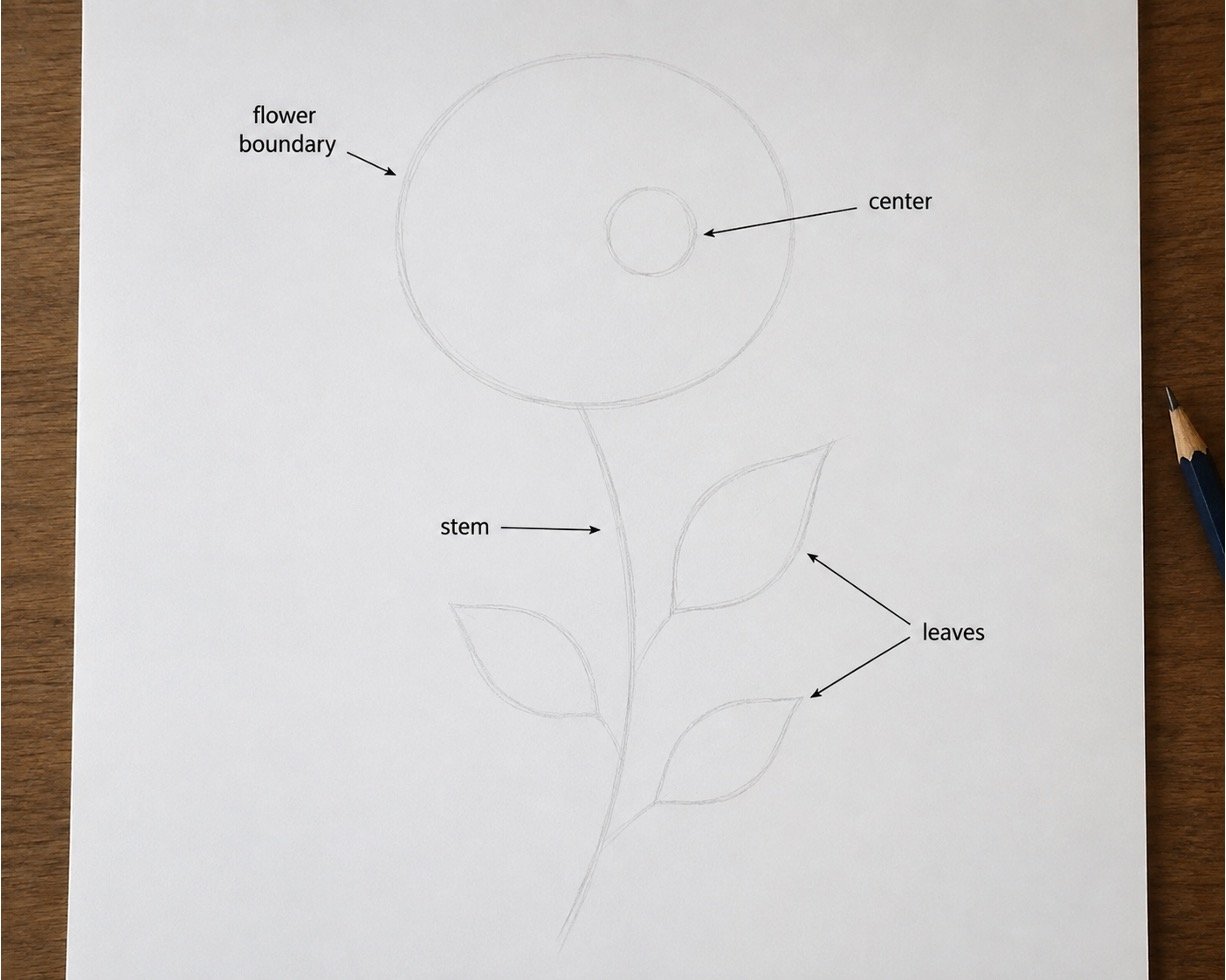
Use an H or 2H pencil and very light pressure. Draw a loose oval for the full flower, then place a small circle slightly above its center for the tightly curled inner petals. Add one gently curving line for the stem and simple pointed shapes for any leaves. Keep every line pale enough that it can be erased without leaving a groove in the paper.
Beginner tip: A common mistake is pressing hard because you want the sketch to look clear; hold the pencil farther from its tip and let the lines remain faint and adjustable.
Step 2: Refine the Outer Contour
Goal: Replace the rough guide shapes with a believable outer edge and the first overlapping petals.
Instructions:
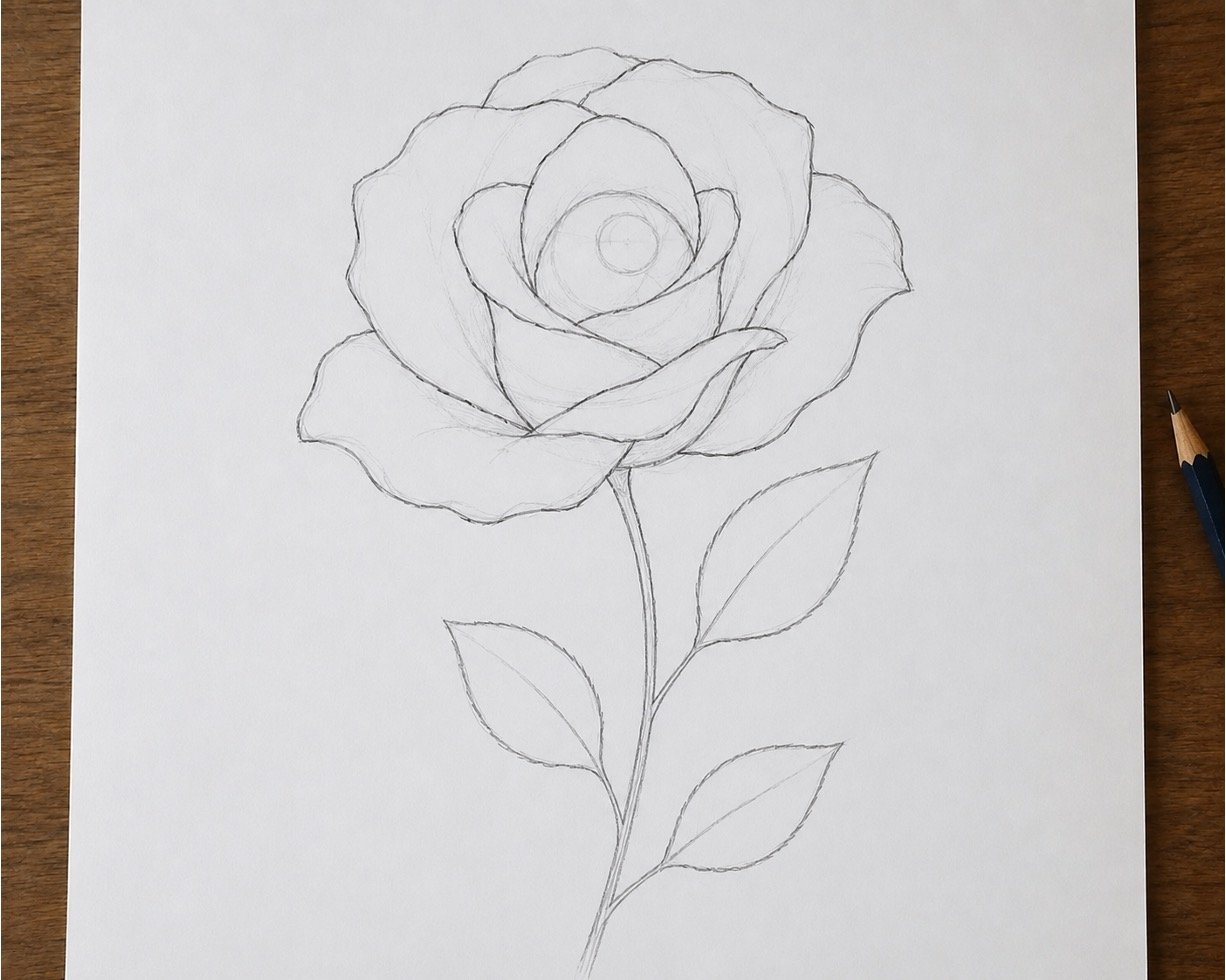
Use an HB pencil to draw the rose’s contour, meaning the visible outer edge of the subject. Turn parts of the large oval into broad, uneven petal edges rather than tracing it as a perfect circle. Add three to five large outer petals, allowing each one to partly cover the petal behind it. Refine the stem and leaves, but leave most of the pale guidelines in place for now.
Beginner tip: Avoid making every petal the same size and shape; vary their width, tilt, and amount of overlap so the flower looks natural.
Step 3: Build the Petal Structure
Goal: Show how the rose’s petals wrap around its center and open outward in layers.
Instructions:
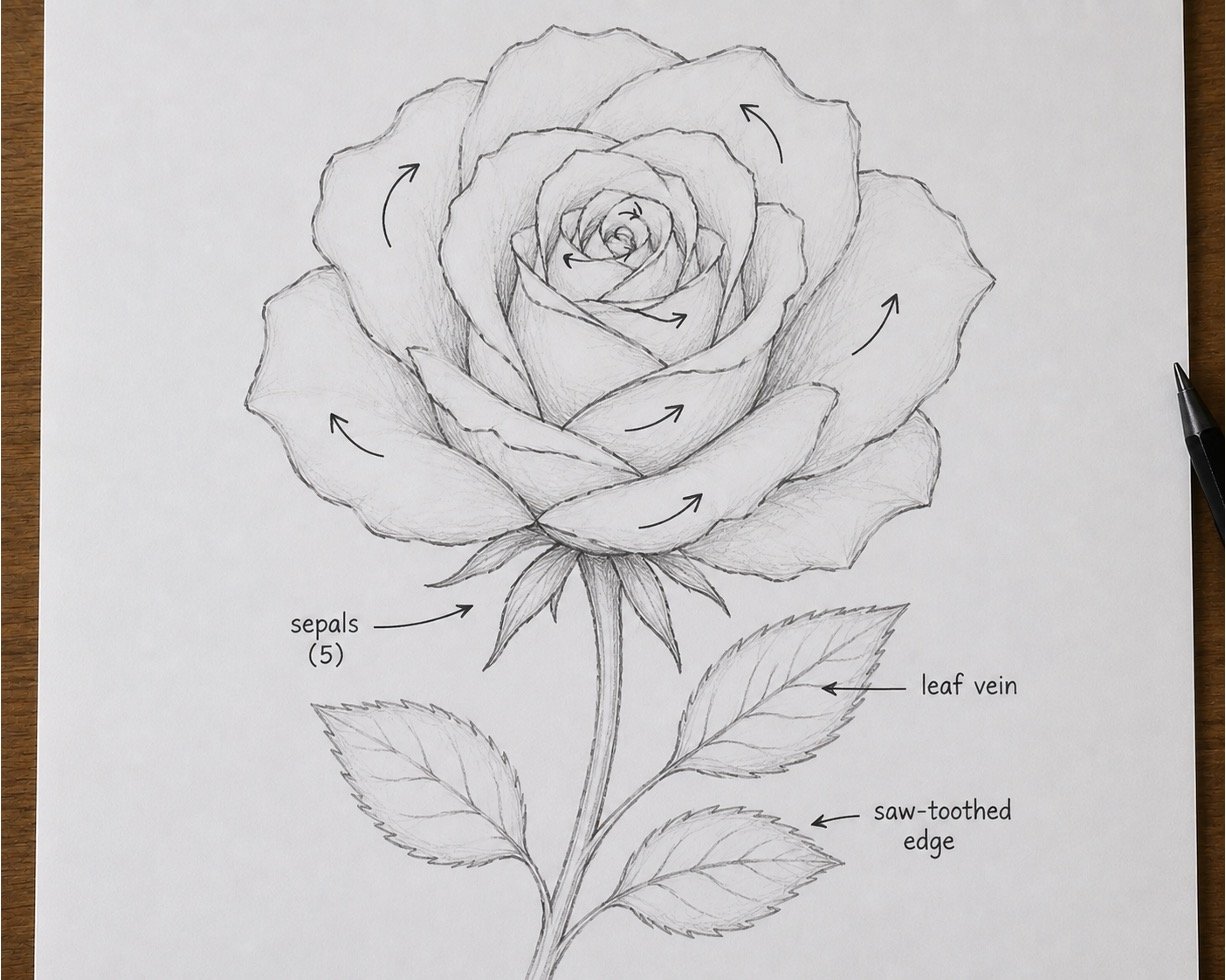
Begin inside the small center circle and draw a short curved shape like a loose spiral. Surround it with small folded petals, then gradually make the petals larger as you work outward. Add curved lines only where one petal overlaps another instead of outlining every petal completely. Beneath the flower, draw a few narrow sepals—the pointed green parts that support the base of a rose—and add a central vein to each leaf.
Beginner tip: The most common mistake is filling the center with many random lines; add one petal at a time and check which edge sits in front before drawing the next.
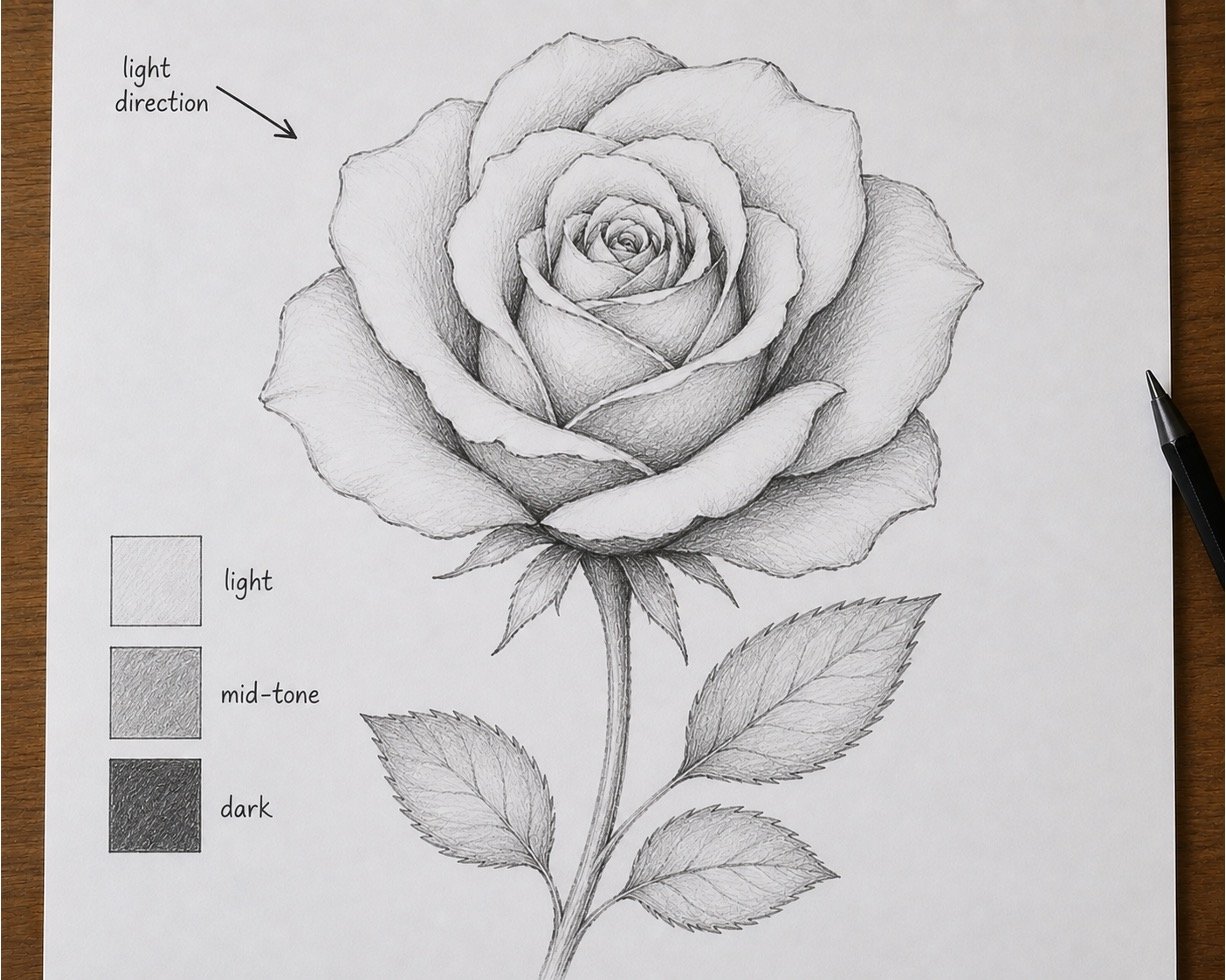
Step 4: Add the Main Light and Shadows
Goal: Use three clear levels of light and dark to make the rose appear rounded rather than flat.
Instructions:
Choose a light source, meaning the direction from which the light reaches the flower, such as the upper left. Leave upward-facing petal surfaces light, shade downward-curving areas with an HB pencil, and use a 2B pencil in the deepest spaces between overlapping petals. These light, middle, and dark areas are called values—the relative lightness or darkness of a mark. Shade with small, gentle strokes that follow the curve of each petal.
Beginner tip: Do not make every petal edge dark; save your darkest marks for narrow gaps, deep folds, and areas hidden from the light.
Step 5: Add Petal and Leaf Texture
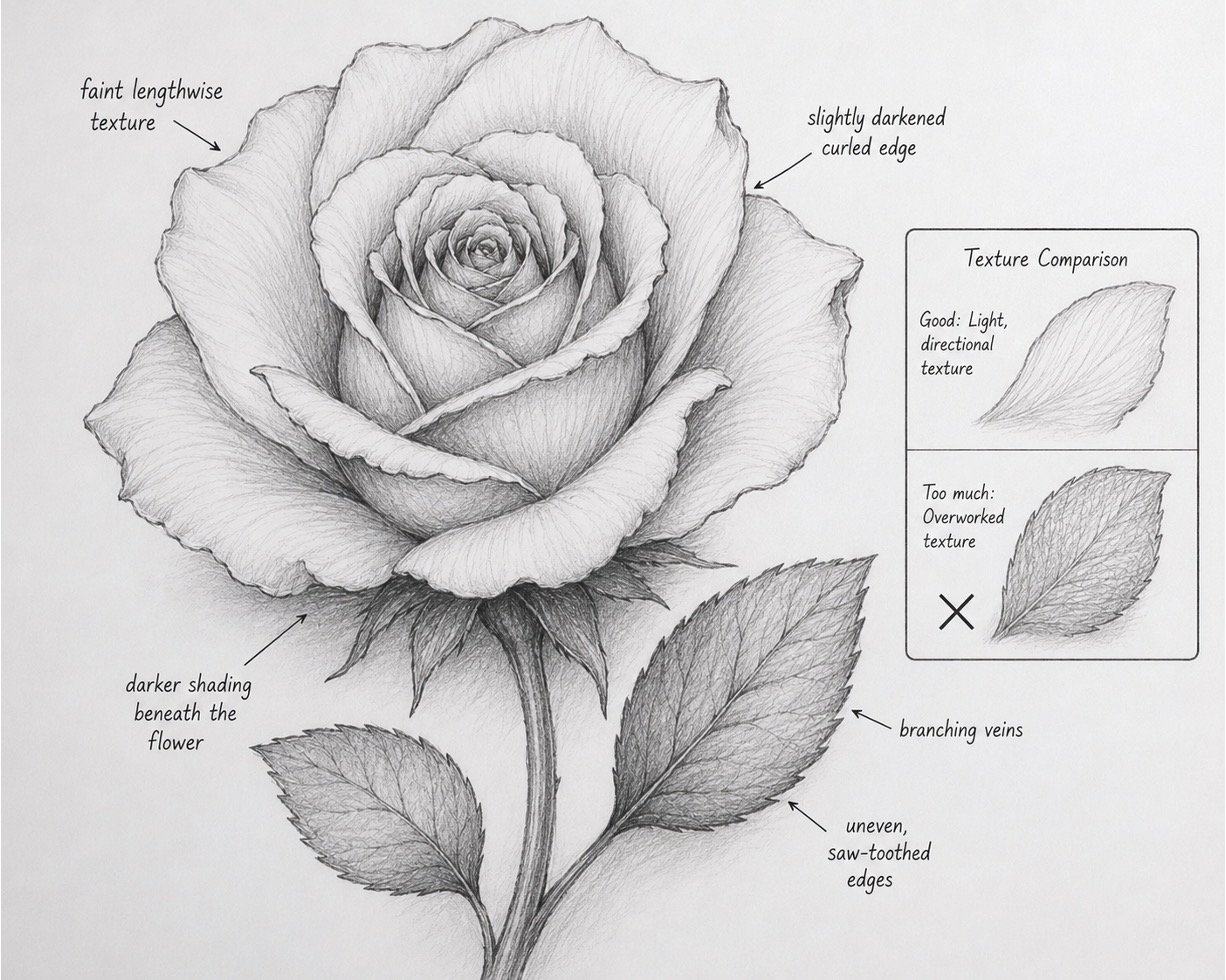
Goal: Introduce subtle surface details without covering the larger shapes and shading.
Instructions:
Use a sharp HB pencil to add a few faint lines that follow the length and curve of selected petals. Darken some curled petal edges, but leave other edges soft so the rose does not look cut out. Add fine veins to the leaves and short irregular marks along their saw-toothed borders. Use a 2B pencil to deepen a few stem and leaf shadows where they turn away from the light.
Beginner tip: A common mistake is adding lines to every surface; keep most petals smooth and place fine details only where they help explain a fold or change in direction.
Step 6: Blend, Highlight, and Polish
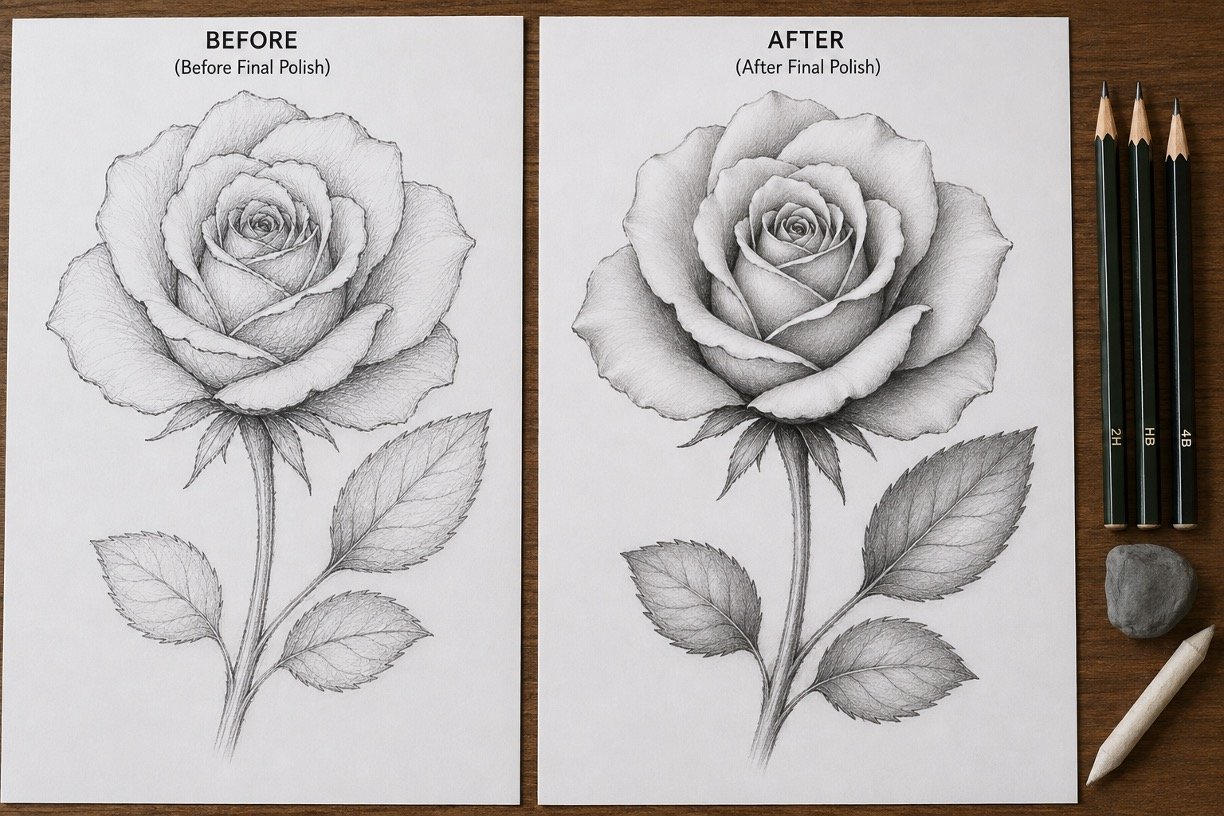
Goal: Clean the drawing, soften selected transitions, and strengthen the final lights and darks.
Instructions:
Use a blending stump, cotton swab, or folded tissue to soften some shaded areas, moving in the same direction as the petal curves. Do not rub across the whole flower; keep several edges crisp so the petals remain separate. Use a kneaded eraser to lift highlights—the brightest areas where light strikes the petals—and clean away the remaining guide marks. Finish with a 2B or 4B pencil in only the deepest gaps, then step back and check that the rose has a clear light side and shadow side.
Beginner tip: Too much blending can turn the flower into a gray blur; blend only obvious pencil streaks and redraw important edges afterward.

About author










Add comment